Site level: Configure Rate Schedules
The user can add, edit, and delete Rate Schedules for the configured resource types.
Edit Rate Schedules
Perform the following steps to edit the rate schedule:
- Under any site, click theConfigurationmenu and go to theRate Schedulestab.Rate Schedules
 The user can view all the available resource types in the rate schedule.
 - On the required resource type, click the [
 ] icon.
 - In theEdit Rate Schedulesdialog box, edit the fields and clickSave.Edit Rate Schedule
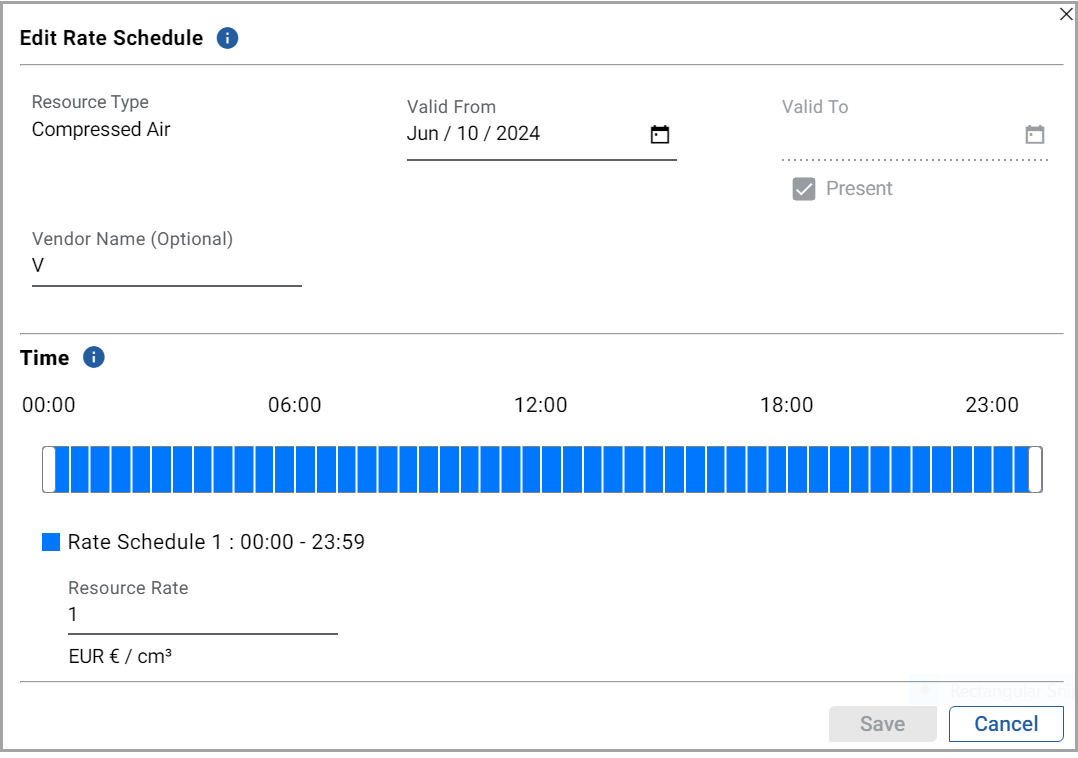 The "Resource type updated successfully” message is displayed.
Add Rate Schedules
Perform the following steps to add a rate schedule:
- Under theRate Schedulestab, clickAdd.
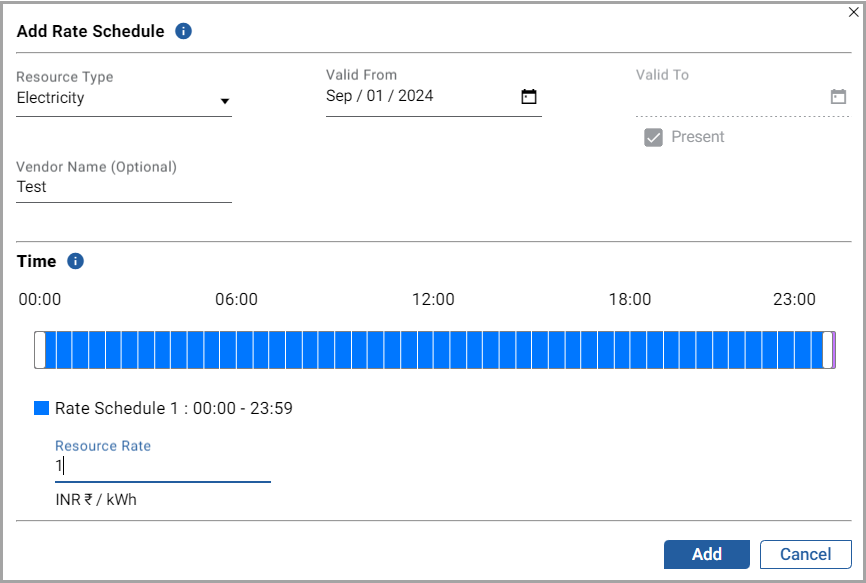
- In theAdd Rate Schedulesdialog box, set these parameters:
- Resource type: Select a resource type from the drop-down list.
- Valid from: Click the [
 ] icon and select the date.
 - Valid hours fromandValid hours to: Click the [
 ] icon and select hours.
 - Resource rate: Provide a resource rate value.
- Resource unit: Select a resource unit from the drop-down list.
- Vendor name: Provide a name.
- ClickAdd.Add Rate Schedule
 The "Resource type added successfully” message is displayed.
Delete Rate Schedules
Perform the following steps to delete the rate schedule:
- ClickConfigurationand go to theRate Schedulestab.
- On the required resource type, click the [
 ] icon.
 - In theDelete Rate Scheduledialog box, clickDelete.Delete Rate Schedule
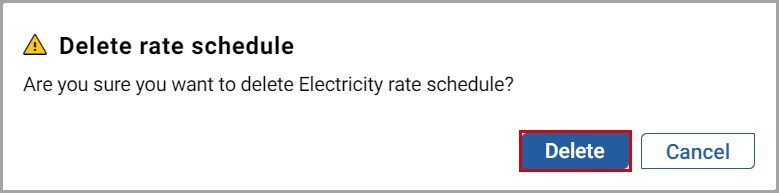 The “Resource type deleted successfully” message is displayed.
NOTE:
When there is an overlapping in the rate schedule time period, then notification is not shown in the user interface, but it will align the time periods automatically after save.
Provide Feedback