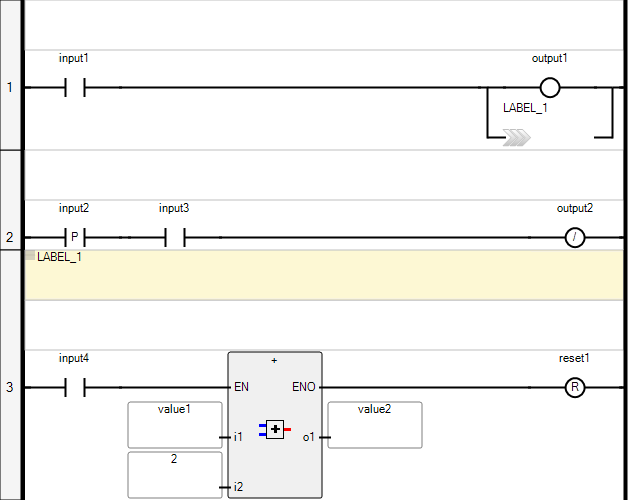
Jumps
Conditional and unconditional jump elements enable controlling the
execution of diagrams. Connections cannot be placed to the right of a jump element. When the
connection on the left of the jump element has the TRUE Boolean state, the diagram execution
proceeds at the label. The label and jump must have the same name.
Inserting backward
jumps in the diagram may block the PLC loop.
Example:
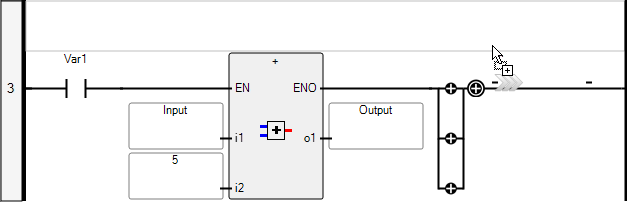
While dragging jumps from either the toolbox or within a diagram, the language editor
displays the possible drop points. Drop points are displayed as plus signs in a black
circle. For elements, the possible drop points are displayed on the rung. For instance,
since a rung can only have one jump, the editor does not display possibilities when dragging
another jump onto the rung. However, if a parallel branches are placed on a rung, the editor
displays possible locations for jumps on the rung and on all branches.
Drop points on
a rung while dragging elements over the rung
Task | Procedure |
|---|---|
Insert a jump | Before inserting jumps, define one or more labels within the program. Insert
jumps from the Toolbox , contextual menus, or using keyboard shortcuts.
While inserting or dragging a jump, drop points indicate the possible locations
where the jump can be placed on a rung.
|
Drag a jump | When dragging jumps, the possible drop points on a rung are displayed while
moving over the rung.
|
Provide Feedback