Add additional rungs and edit variable assignments
Use the following steps to add rung 2 and rung 3 by copying rung 0 and rung 1, edit the variable assignments, and then build the Traffic_Light UDFB.
An error icon  next to a variable name indicates:
- A variable name must be assigned.
- A constant value must be entered.
- A data type mismatch.
Prerequisites
To add additional rungs and edit variable assignments
- Duplicate rung 0 and rung 1 by doing the following:
- Select the first rung.
- Select the second rung while selecting theCtrlkey.
- Right-click any rung, and then selectCopy.
- Right-click rung 1, and then selectPaste.
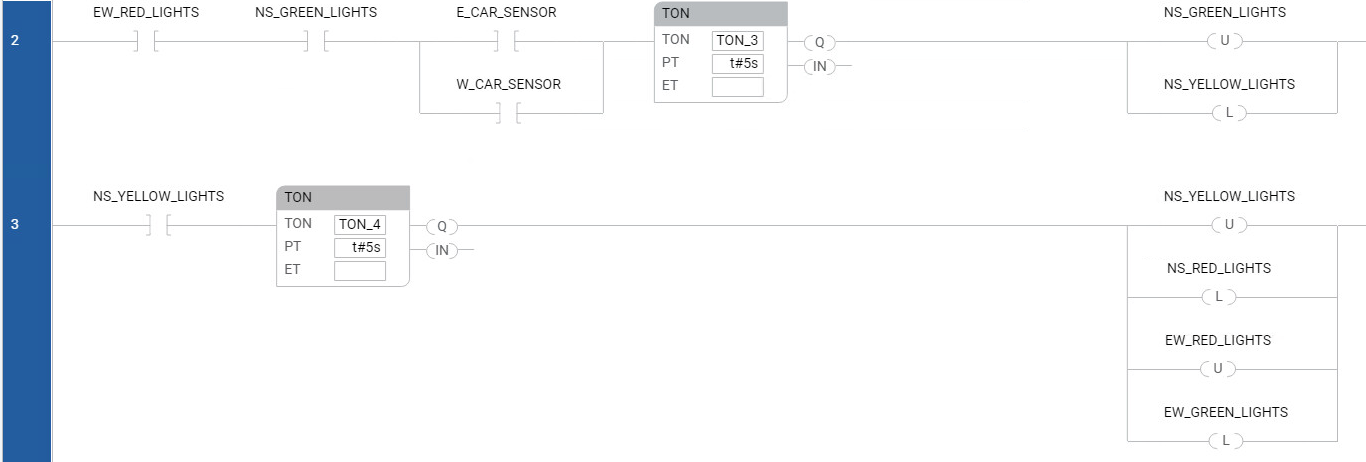
You can also use the shortcut key to copy and paste rungs. - In rung 2, assign the variableTON_3to the TON.
- In rung 3, assign the variableTON_4to the TON.
- In rung 2 and rung 3, do the following:
- Change each EW variable to the NS variable.
- Change each NS variable to the EW variable.
- (optional) Enter rung comments.
- Verify that rung 2 and rung 3 look similar to the following example:
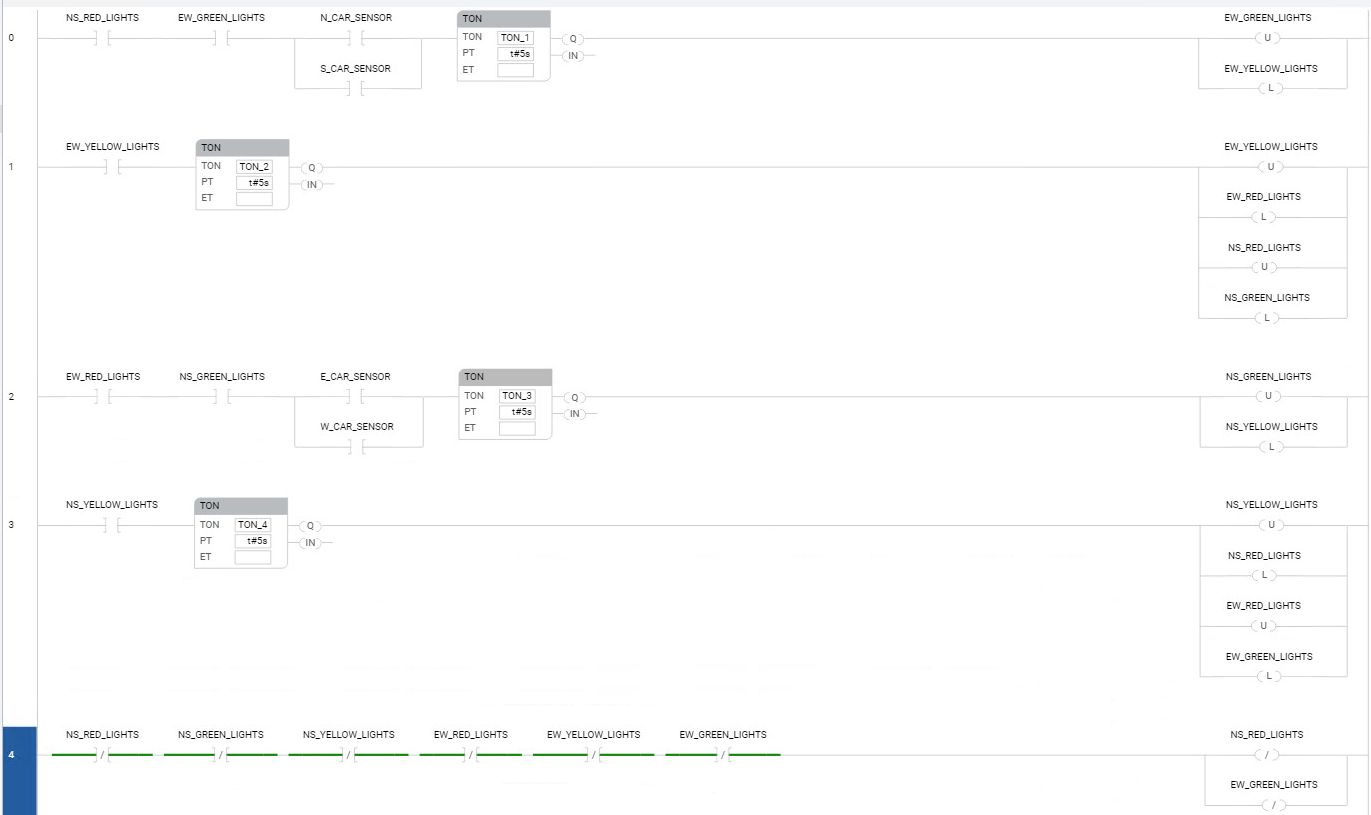
- Add rung 4 to the end.The logic is:When the program is first downloaded to the controller and run, none of the traffic lights are initially turned on. This last rung checks for the condition (all traffic lights are off), and turns on the North-South red traffic lights and the East-West green traffic lights.
- (optional) Double-click rung 4, selectAdd rung comment, and then enter:To initialize the program after the initial download, if all the lights are turned off, turn on the North-South red lights and the East-West green lights.
- Add the following ladder diagram elements to rung 4 in the order listed from left to right. UseToolboxto add reverse contact elements according to the following table:Ladder diagram elements on rung 4LD ElementPositionNameXIO1 (far left)NS_RED_LIGHTSXIO2NS_YELLOW_LIGHTSXIO3NS_GREEN_LIGHTSXIO4EW_RED_LIGHTSXIO5EW_YELLOW_LIGHTSXIO6 (far right)EW_GREEN_LIGHTS
- Add two OTOs in parallel to turn on the NS_RED_LIGHTS and the EW_GREEN_LIGHTS variables.The entire user-defined function block program looks similar to the following image:
- Build the project by doing one of the following:
- From the menu bar, select .
- Right-click the controller, and then selectBuild.
- InOutput, view the build result.
- (optional) Fix any errors, and then build the project again.
- Save the project by doing one of the following:
- From the menu bar, select
 .
. - From theFilemenu, selectSave.
Provide Feedback