
Register an Asset Framework (PI-AF) Connector
Perform the following steps to register an Asset Framework (PI-AF) connector:
- Select theExtractor Infotab from the left pane.TheExtractor Listingpage is displayed.
- Click the [+] icon from the top-left corner of the page.Extractor Info Tab
 TheExtractor Info Detailpage is displayed.Extractor Info Detail Page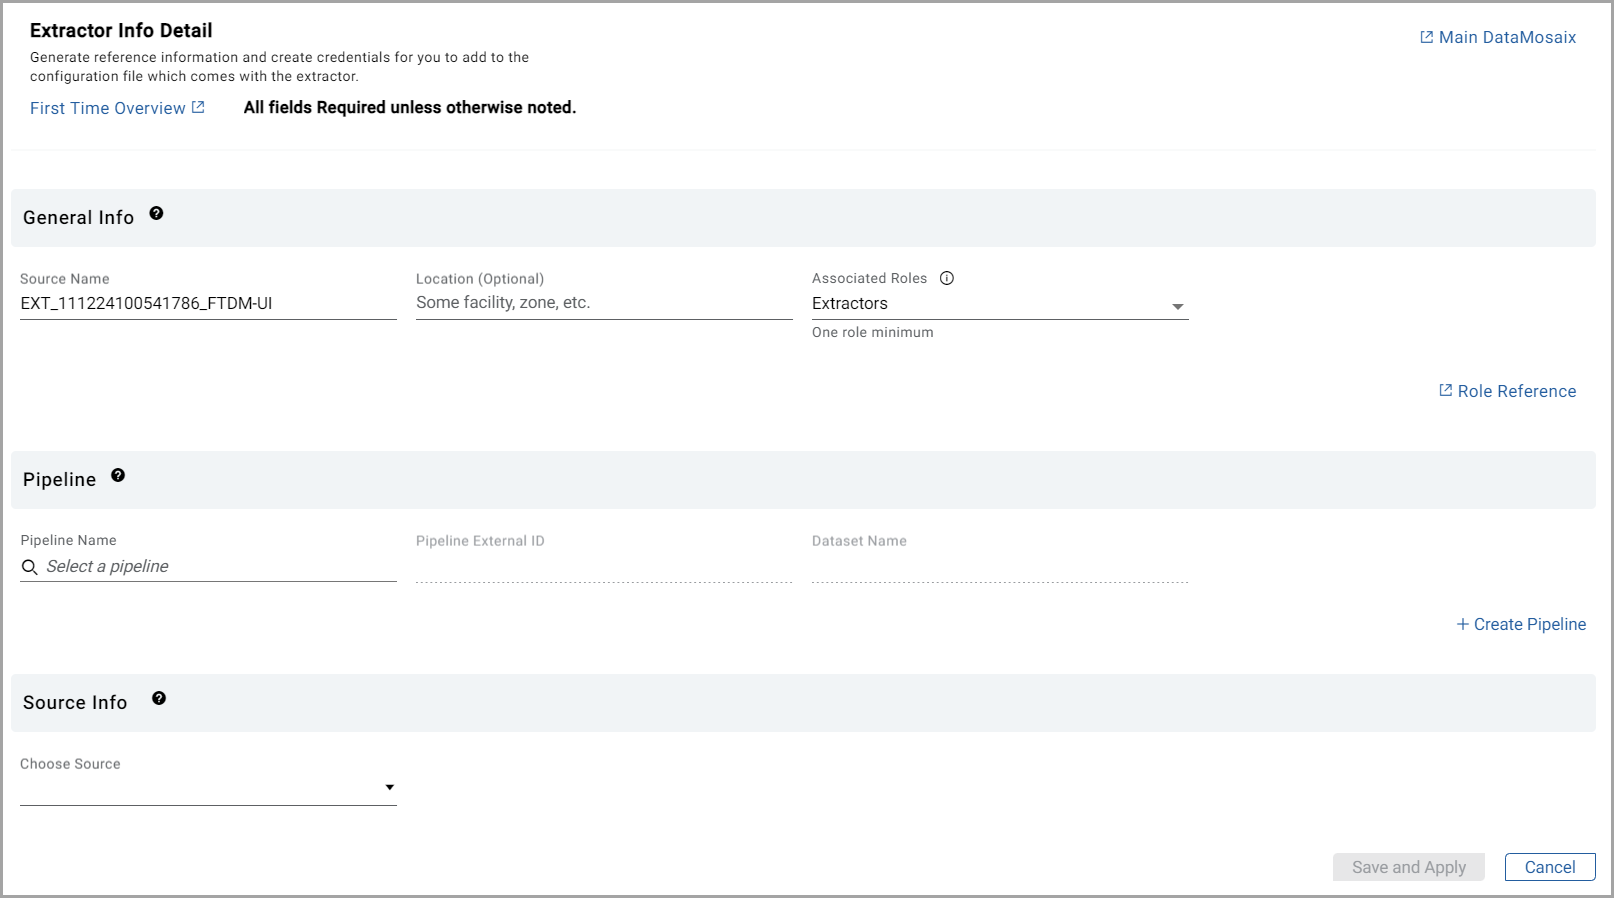
- In theGeneral Infosection, provide the following details:
- Source Name: By default, DataMosaix generates a source name. The user can also provide a unique name for the extractor.NOTE:The Source Name works as the identifier for your extractor. You can search for an extractor with the Source Name. For example: EXT_140623100541786_createproject_v1. Here, EXT stands for extractor, 140623 is the date in ddmmyy format, 100541786 is the timestamp in hhmmssSSS format (SSS represents milliseconds), and createproject_v1 is the project in which you are currently working. You can use the default source name or create your own.
- Location(Optional): Provide the location details for which you are creating the extractor.NOTE: This information can help you to identify an extractor when you have many extractors for different plants/sites/locations.
- Associated Roles: By Default, theExtractorsrole is selected. You must choose at least one role from theAssociated Rolesdrop-down list. You can also select multiple roles from the drop-down list. Use the search bar to find a specific role. If you want to apply all roles to the application, select theSelect Allcheckbox.NOTE:ClickRole Referenceto view various roles and capabilities. TheAssociated Rolesdrop-down is visible and available only for Project Admin users or users within the organization with a Project Admin role assigned.General Info Section
 In thePipelinesection, the user can create a new pipeline or use an existing pipeline.
- To use an existing pipeline, select the required option from thePipeline Namedrop-down list. ThePipeline External IDandDataset Namefields are auto-populated.
- To create a new pipeline, perform the following steps:
- Click+ Create Pipeline.TheCreate Pipelinedialog box is displayed.Create Pipeline Dialog
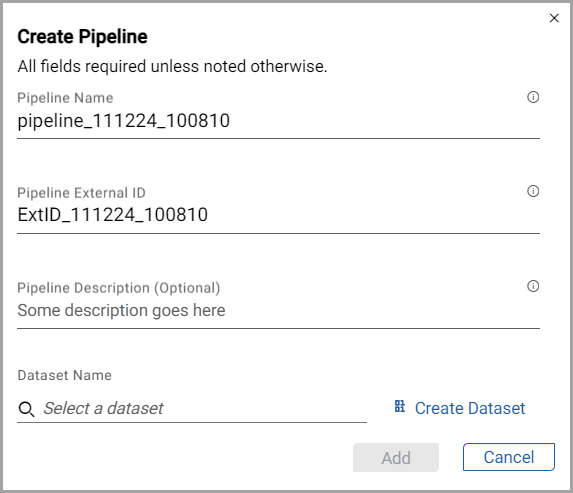
- Provide the following Pipeline information:
- Pipeline Name: By default, DataMosaix generates a pipeline name. The user can also provide a unique name for the pipeline.
- Pipeline External ID: By default, DataMosaix generates a pipeline external ID. The user can also provide a unique external ID for the pipeline.
- Pipeline Description(Optional): Provide the description for the pipeline.
- When you create a pipeline, you can either use an existing dataset from theDataset Namedrop-down list or create a new dataset.If you want to create a new dataset, clickCreate Datasetand provide the following information:
- Dataset Name: By default, DataMosaix generates a dataset name. The user can also provide a unique name for the dataset.
- Dataset Description: Provide the description for the dataset.
- ClickAdd.Based on the options you choose (select or create), the Pipeline and Dataset information is either generated or created and displayed on theExtractor Info Detailpage.Create Dataset

- In theSource Infosection, perform the following steps:
- Select theAsset Framework (PI-AF)source from the drop-down list.
- Provide the Asset Framework Host in theHostbox.
- ClickSave and Apply.Source Info
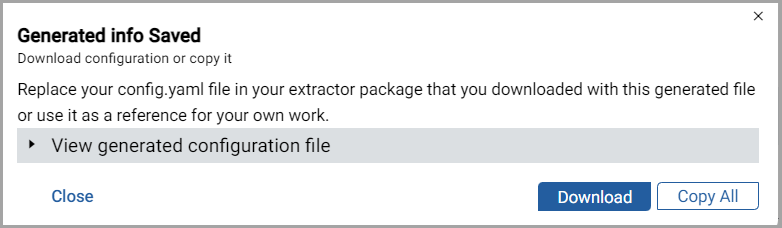
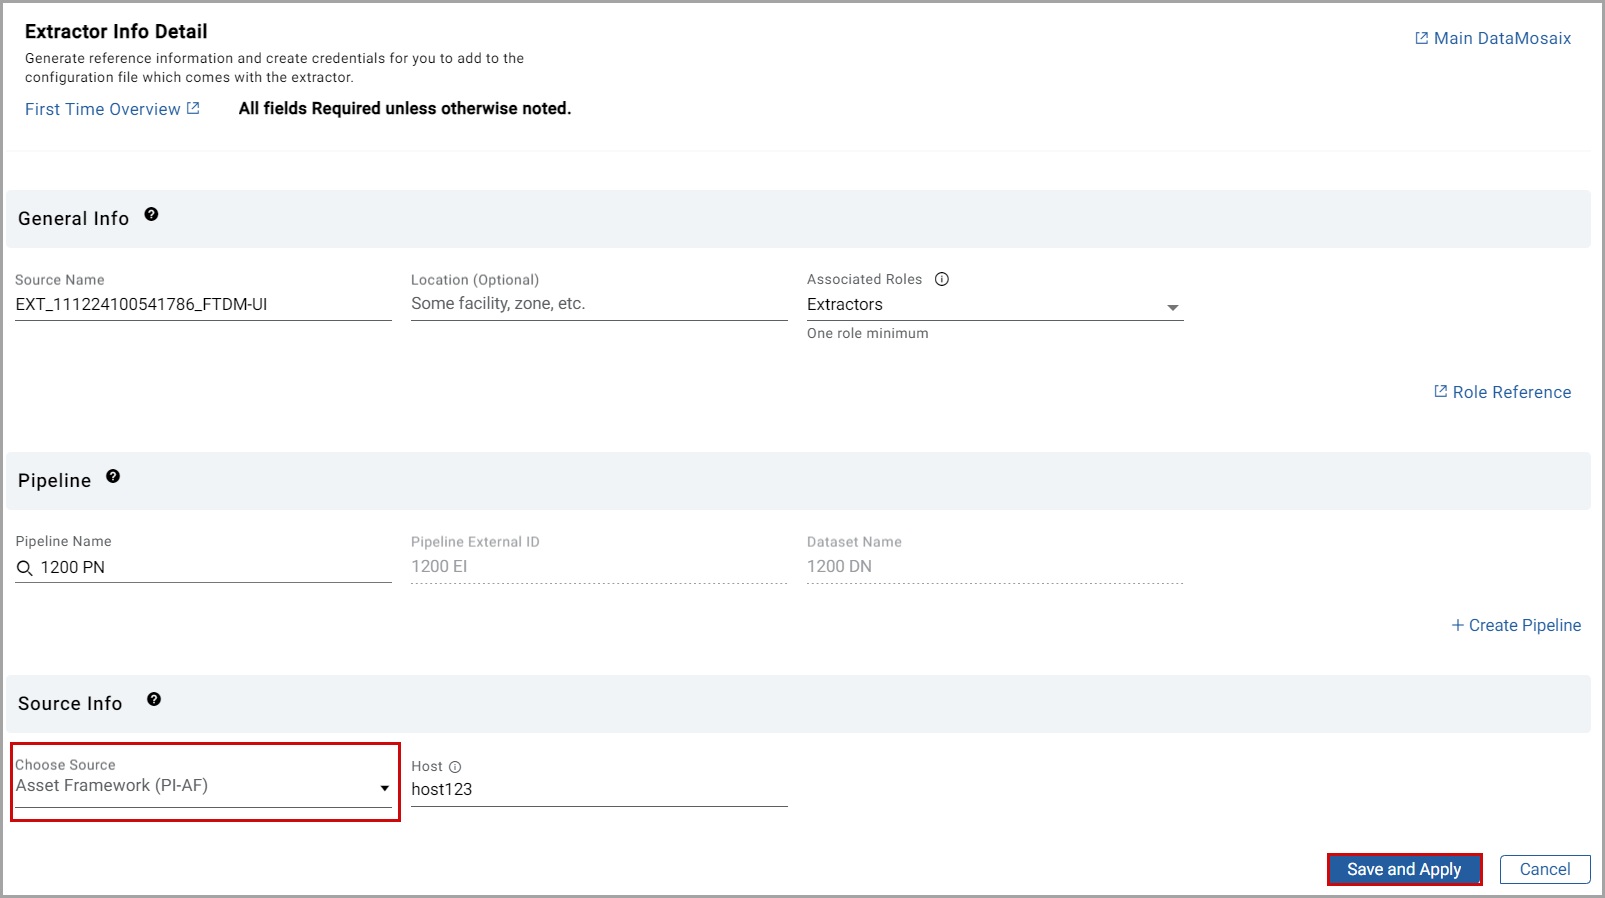 NOTE:TheSave and Applybutton enable only after you provide all the required details.TheGenerated info Saveddialog box is displayed, and it contains the configuration information. ClickView generated configuration fileto view the configuration file details. ClickCopy Allto copy and save the information for future.
 - ClickDownload.Theconfig.ymlfile is downloaded in the Downloads folder of your local machine. It contains all the configuration information needed to run the extractor.
- ClickCloseto close the dialog box.Generated Info Saved Dialog
 The new extractor is displayed in theExtractor Listingpage.
 - Under theTypecolumn, click theAsset Framework (PI-AF)of the newly created extractor, it will be navigated to the Cognite page.Select Asset Framework (PI-AF)
 Cognite Page
Provide Feedback