Configure Email Settings
The Admin can set up the mail configuration in this menu. This makes it easier for the Admin to communicate through email to other Users.
NOTE:
Only the fields with red asterisk next to them are required. All other fields are optional.
- Enter the SMTP Host name and click [Test connection].
- Once the connection is validated, enter the Port number of the SMTP server.
- Enter a From Display Name in the given field if necessary. This is a user friendly name for the email address being used in the From field. If this is not configured, the application will use the email address provided in the From field.
- Enter the email address that you want the application to use as a Sender into the From field. This can be an automated email address that will not be able to send reply emails.
- Reply To Display Name the address used for the Reply To SMTP header for the mails sent. If you would like the receiver of the email to reply, enter an email address in this field. This is optional, if this field is not configured, the application will use the email address provided in the From field.
- The Reply To Display Name is a user friendly name for the email being used in the Reply To field. If this is not configured, the application will use the email address provided in the Reply To field.
- Envelope From denotes the Bounce Address used for the return path for emails sent. If there is some kind of error and the email cannot be sent, a failure to send email will be sent to this address.
- If you would like to turn HTTPS on, change the Enable SSL toggle switch to ON. You can also enable TLS by using switching the toggle to ON. Emails are used to recover user names and passwords so it is recommended to use SSL or TLS.NOTE:You will most likely need to change the Port number to the default for SSL/TLS which is 465.
- If your SMTP server requires authentication, toggle the switch to ON in the [Enable Authentication] field. This will require the Admin to enter the Username and Password.Configure Email Settings
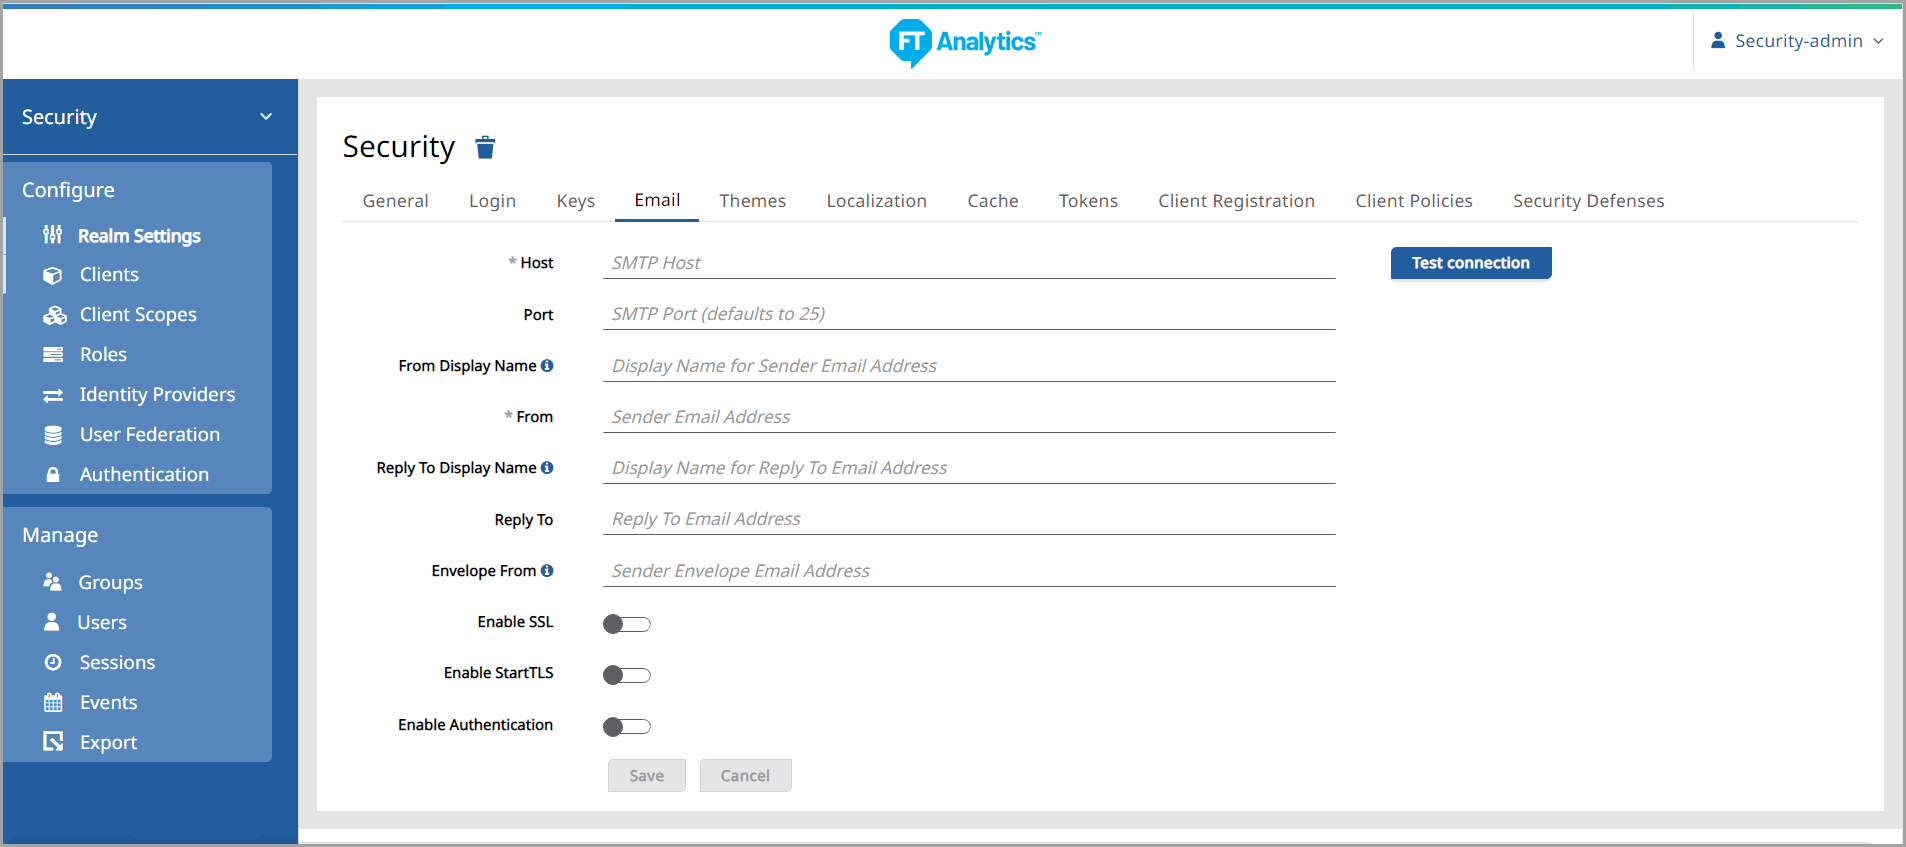
- Click [Save] to update the Mail Configuration changes.
- Click [Cancel] to discard any changes made.
Provide Feedback