Downloads
What is this for?
The Digital Twin interaction between a cobot and a 1-meter MagneMover LITE (MML) system is the foundation for the development of both technologies through Emulate3D. This project can be used to demonstrate MML technologies and robots working together, or as a template for developing digital twin models of these technologies. Using the Studio5000 program, MML vehicles can be commissioned, and a routine can be created.
The implementation of the digital twin model demonstrates the capabilities that enable its use throughout the industry. The model allows for performance tracking of multiple systems on a manufacturing floor. It also provides the opportunity to optimize production processes through digital emulation without the need to shut down production. Additionally, it is possible to ensure higher quality, train operators, and make configuration changes in a secure virtual environment with immersive reach into cyberspace.
General Characteristics
The integration of a MagneMover LITE system and a cobot via a digital twin offers the following features:
- Two-way communication.
- Precise and efficient coordination of tasks.
- Expedited implementation of technology through an efficient and agile programming process.
- Synchronous integration of movements between the movers and cobot.
- Efficient configuration and adjustment of position and time parameters in the motion sequence.
Advantages
- Demonstration of Emulate3D's capability.
- Understanding the underlying logic in the physical movement of the MML system.
- Displaying the physical and digital integration of MML and cobot.
- Interoperability with control systems.
- Real-time performance monitoring of systems.
- Flexible reconfiguration for quick response.
- Adaptability to variations in different processes.
- Energy efficiency of the system.
- Scalability for expansion.
- Safety and quality standards.
Is it useful for me?
Digital Twins are a game-changer for manufacturers looking to optimize their production processes and stay ahead of the competition. By creating a virtual environment to model and analyze their operations, manufacturers can identify inefficiencies and areas for improvement, leading to increased productivity and cost reduction. With Digital Twins, manufacturers can design an efficient layout and allocate equipment accordingly, eliminating the need for hardware testing and saving valuable time and money.
No longer do you have to wait for a machine to be built to test controls and confirm that mechanics and logic are working correctly. This saves valuable time and resources and reduces the costs spent on correcting errors found during the physical implementation stage. By working together, you can visualize an efficient transition for implementing the digital twin in your production lines and understand the benefits it brings.
Once your system is up and running, a digital twin records data on behavioral trends and performance history. This creates a reference for improvements and operational training methods throughout the system's life cycle. With this valuable information at your fingertips, you can optimize your processes, increase efficiency and productivity, and take your manufacturing to the next level.
How can I make it work?
Hardware:
- Cobot UR5
- MML 1m Motor
- 2 MML Movers
- MML Node Controller with Power Supply
- Compact GuardLogix 5380
- Stratix Switch
- 24V Power Supply
Software:
- Studio 5000 (V35)
- Emulate3D
Expertise:
- Knowledge of Motion, ICT, and Emulate3D
Please note: You will need to agree to the Terms & Conditions for each download.
Need Help?
If you need help with an application or have feedback from the Innovation Center, please contact us.
Installation Guide
Step 1:
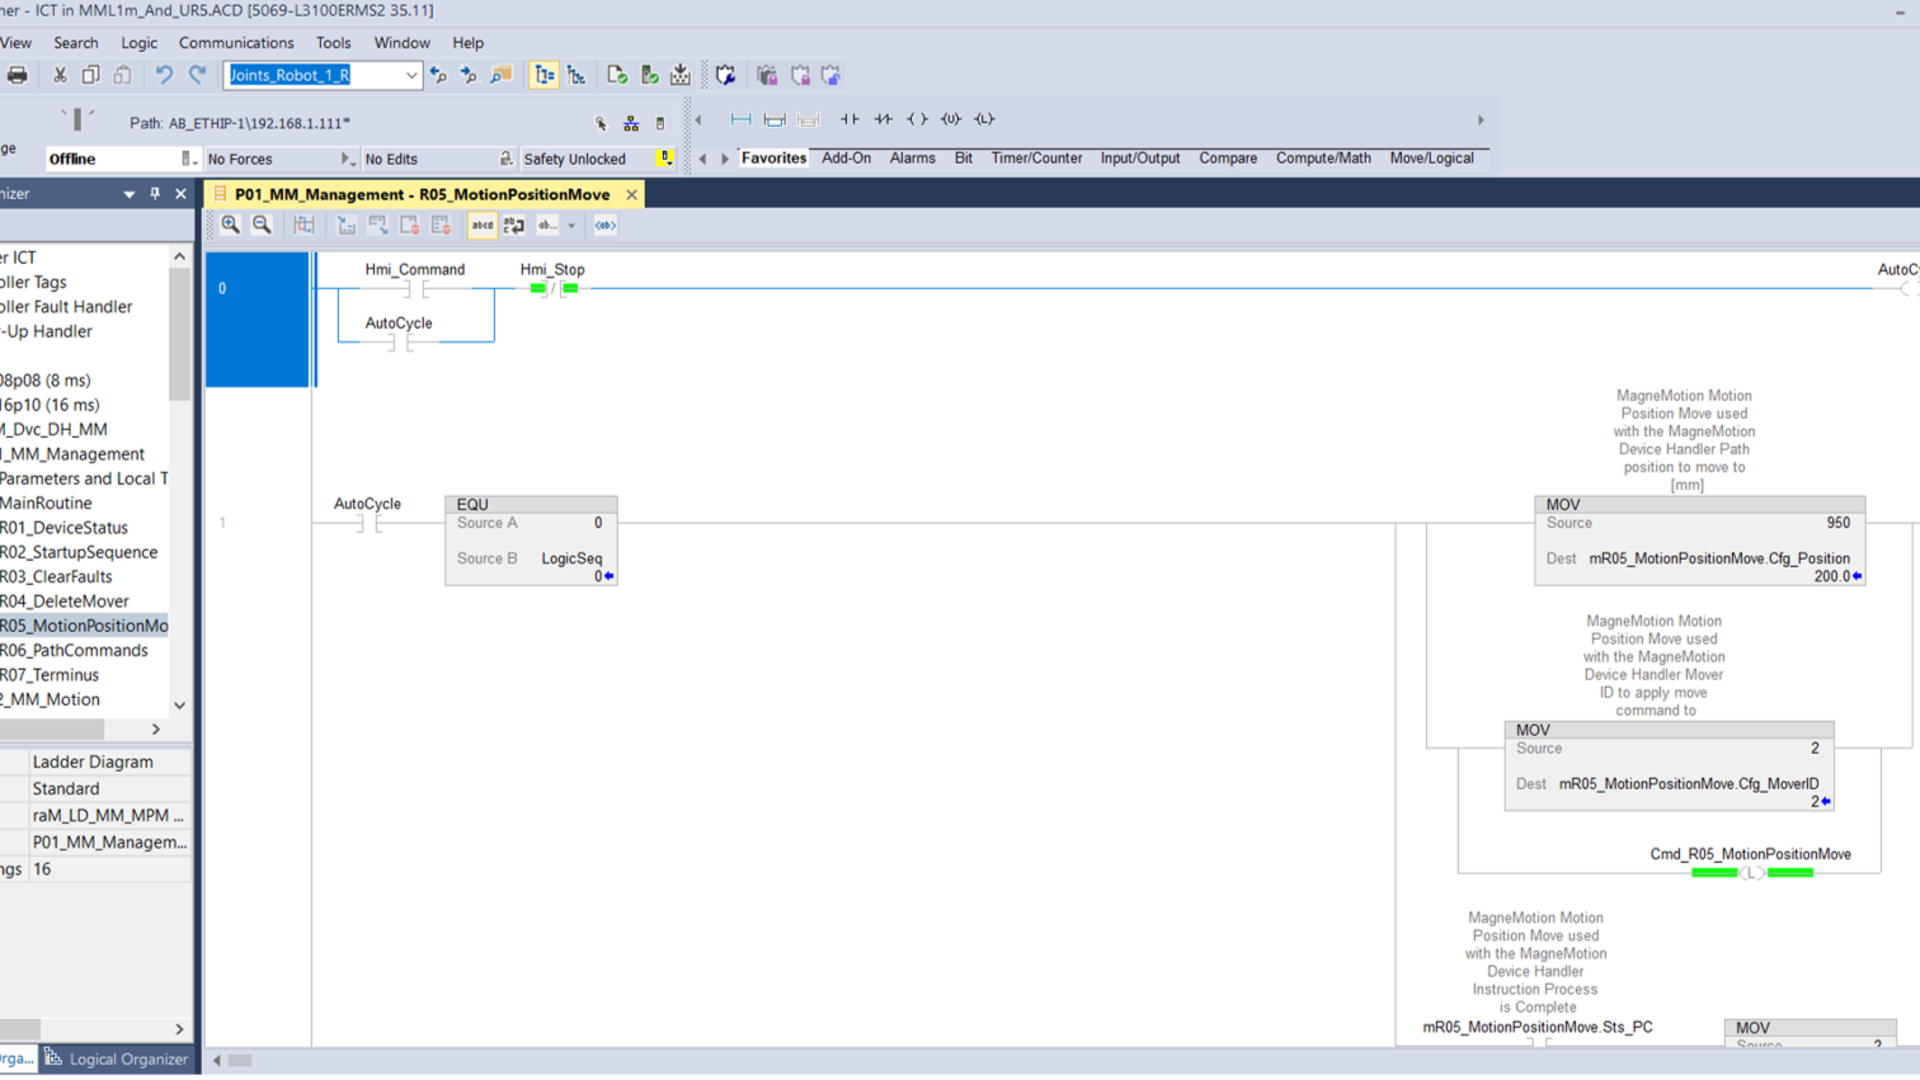
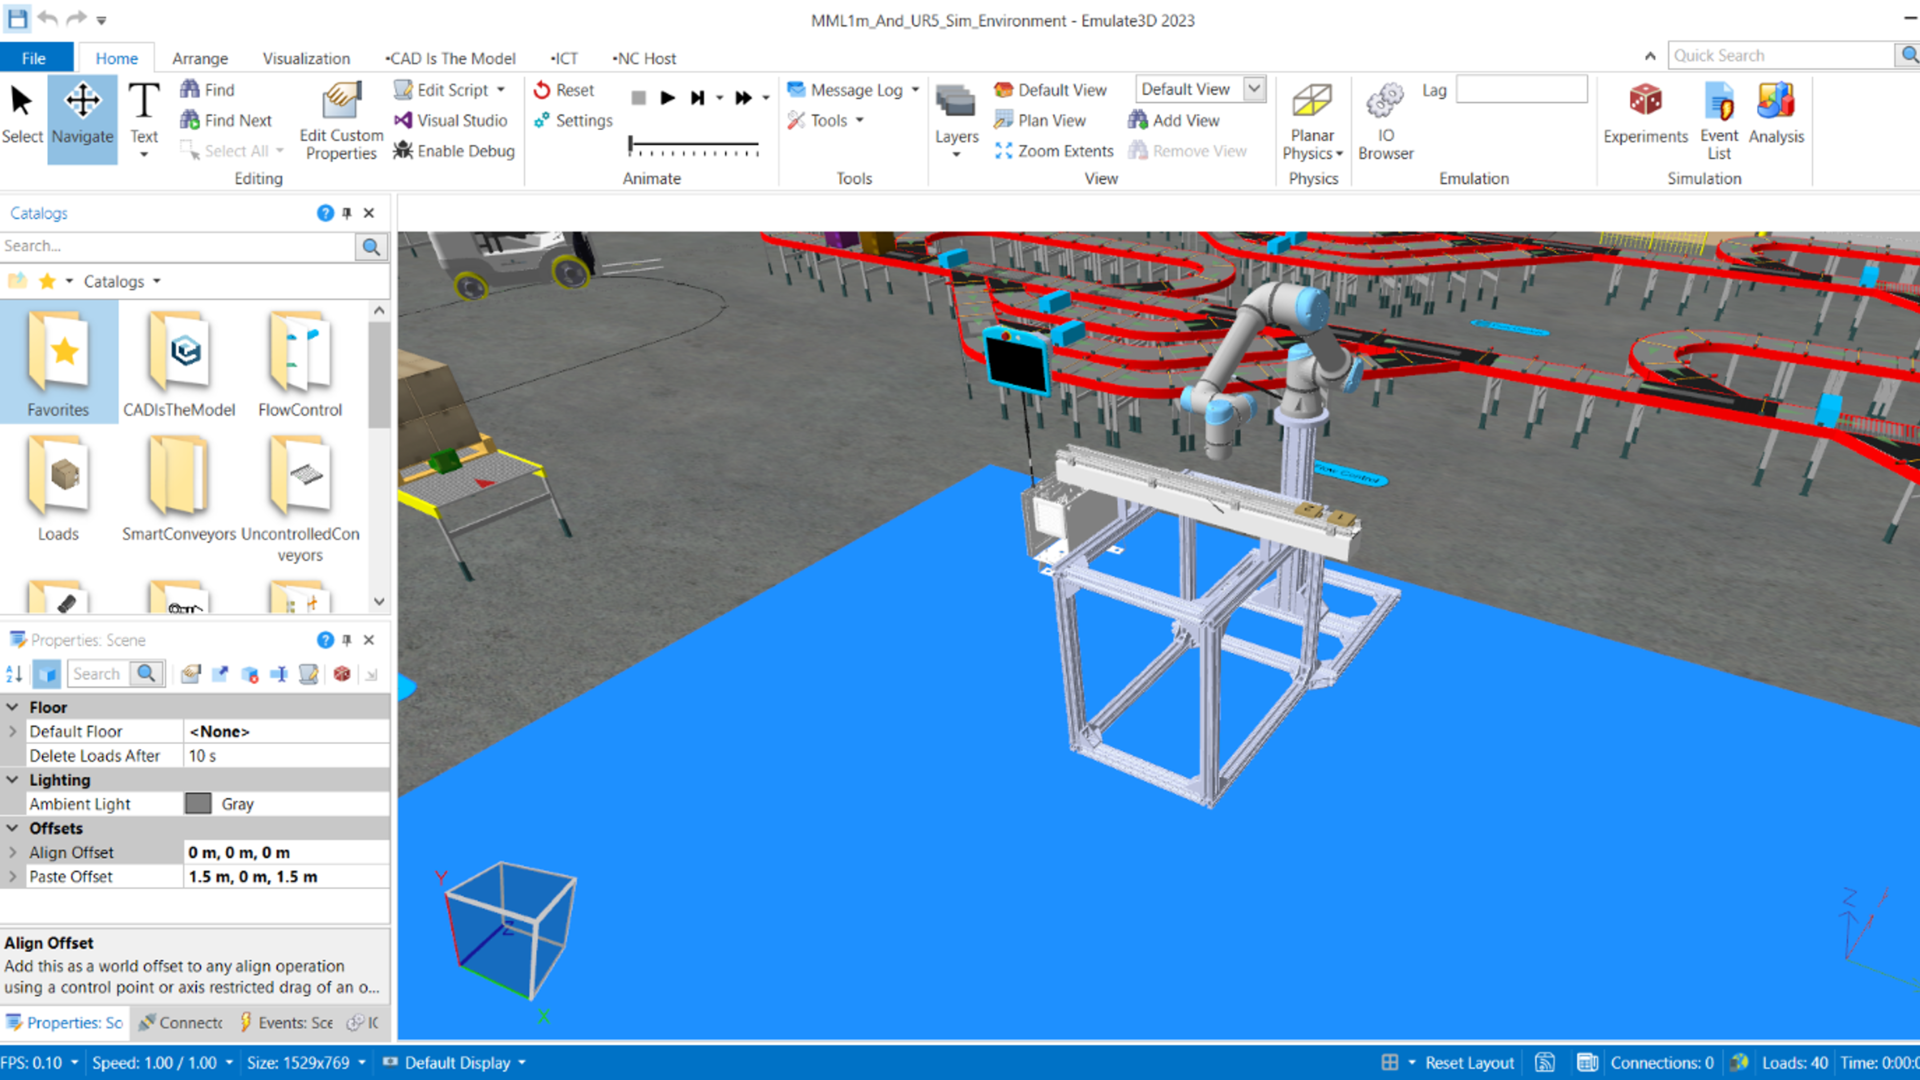
Identify the applications used for implementation: Studio 5000 and Emulate3D.
Step 2
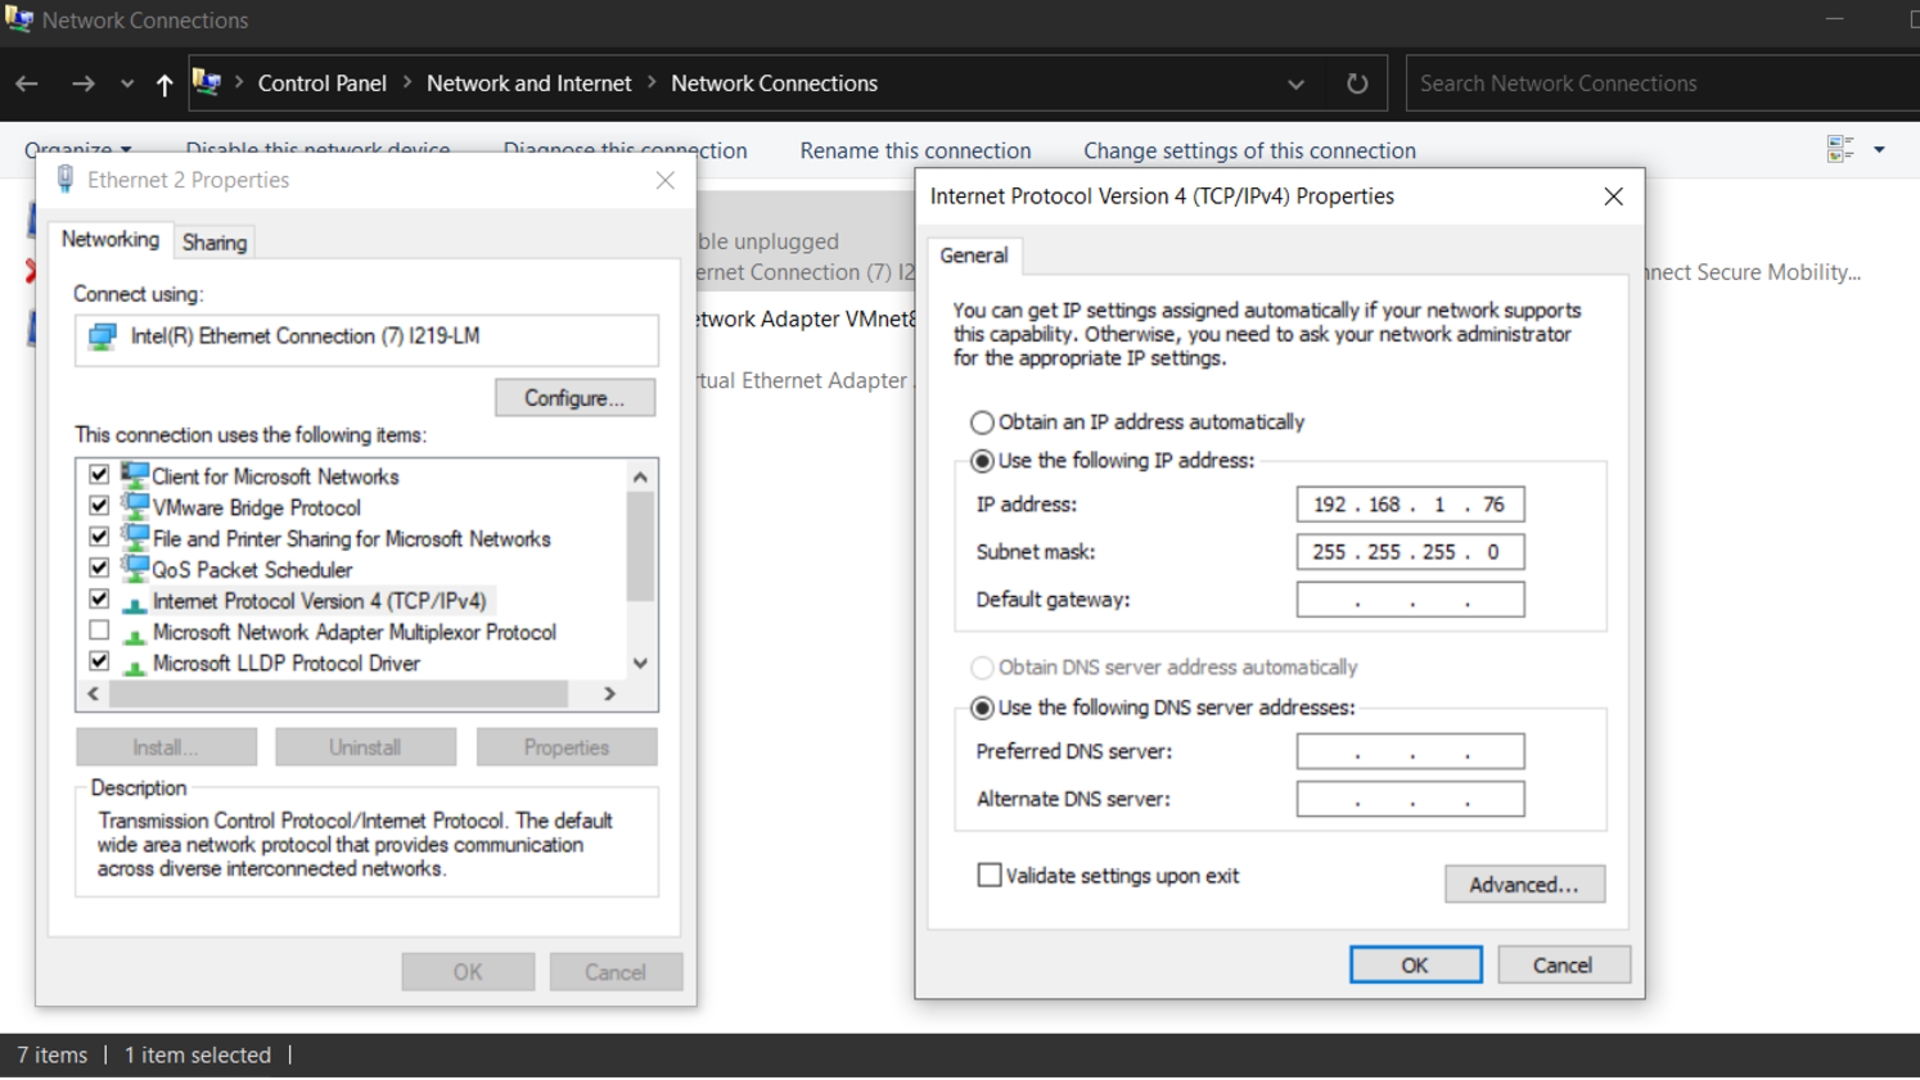
Change the IP address of the components used to place them in the same network mask:
- 2.1 MML system node controller
- 2.2 Computer
- 2.3 Cobot
- 2.4 PLC Controller
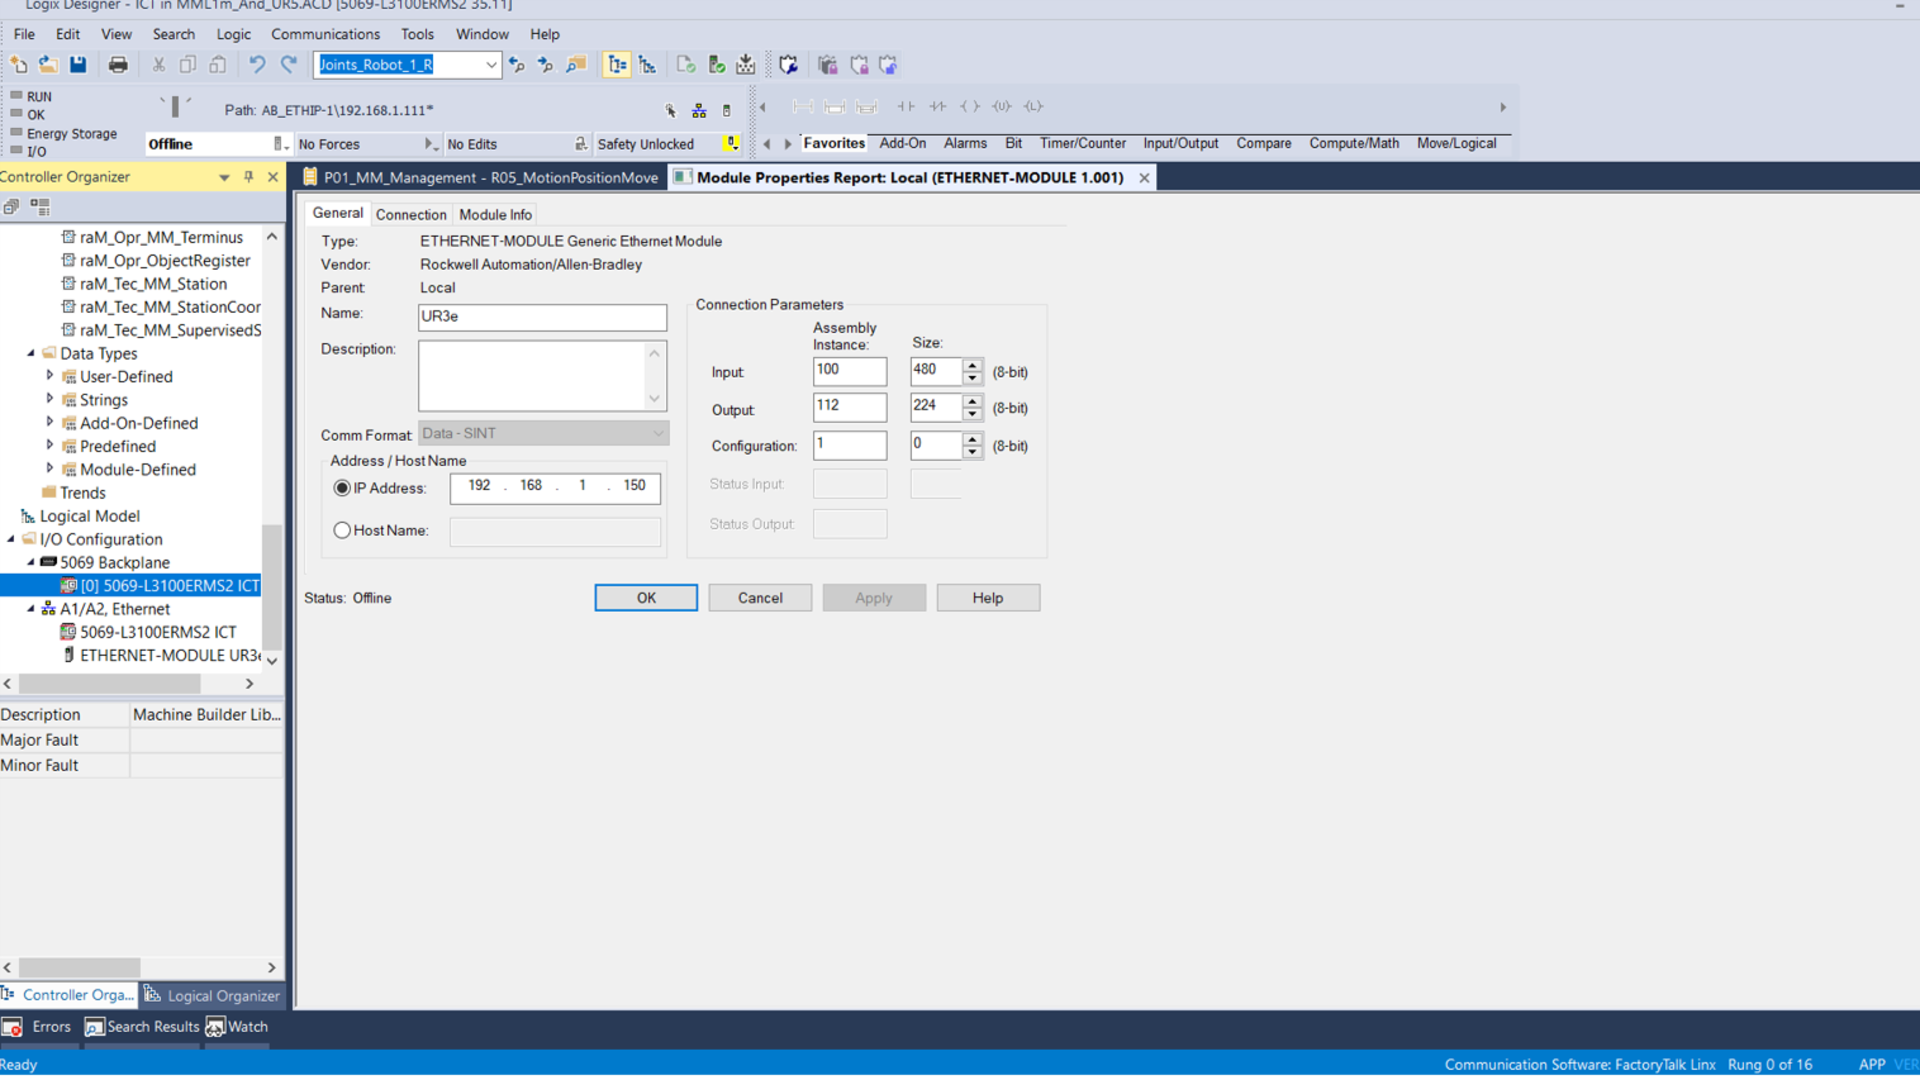
Paso 3:
Replace the physical devices in the Studio 5000 configuration and configure the assigned IP addresses while keeping the same device names.
Step 4
Replace the controller in the Studio 5000 configuration for program download.
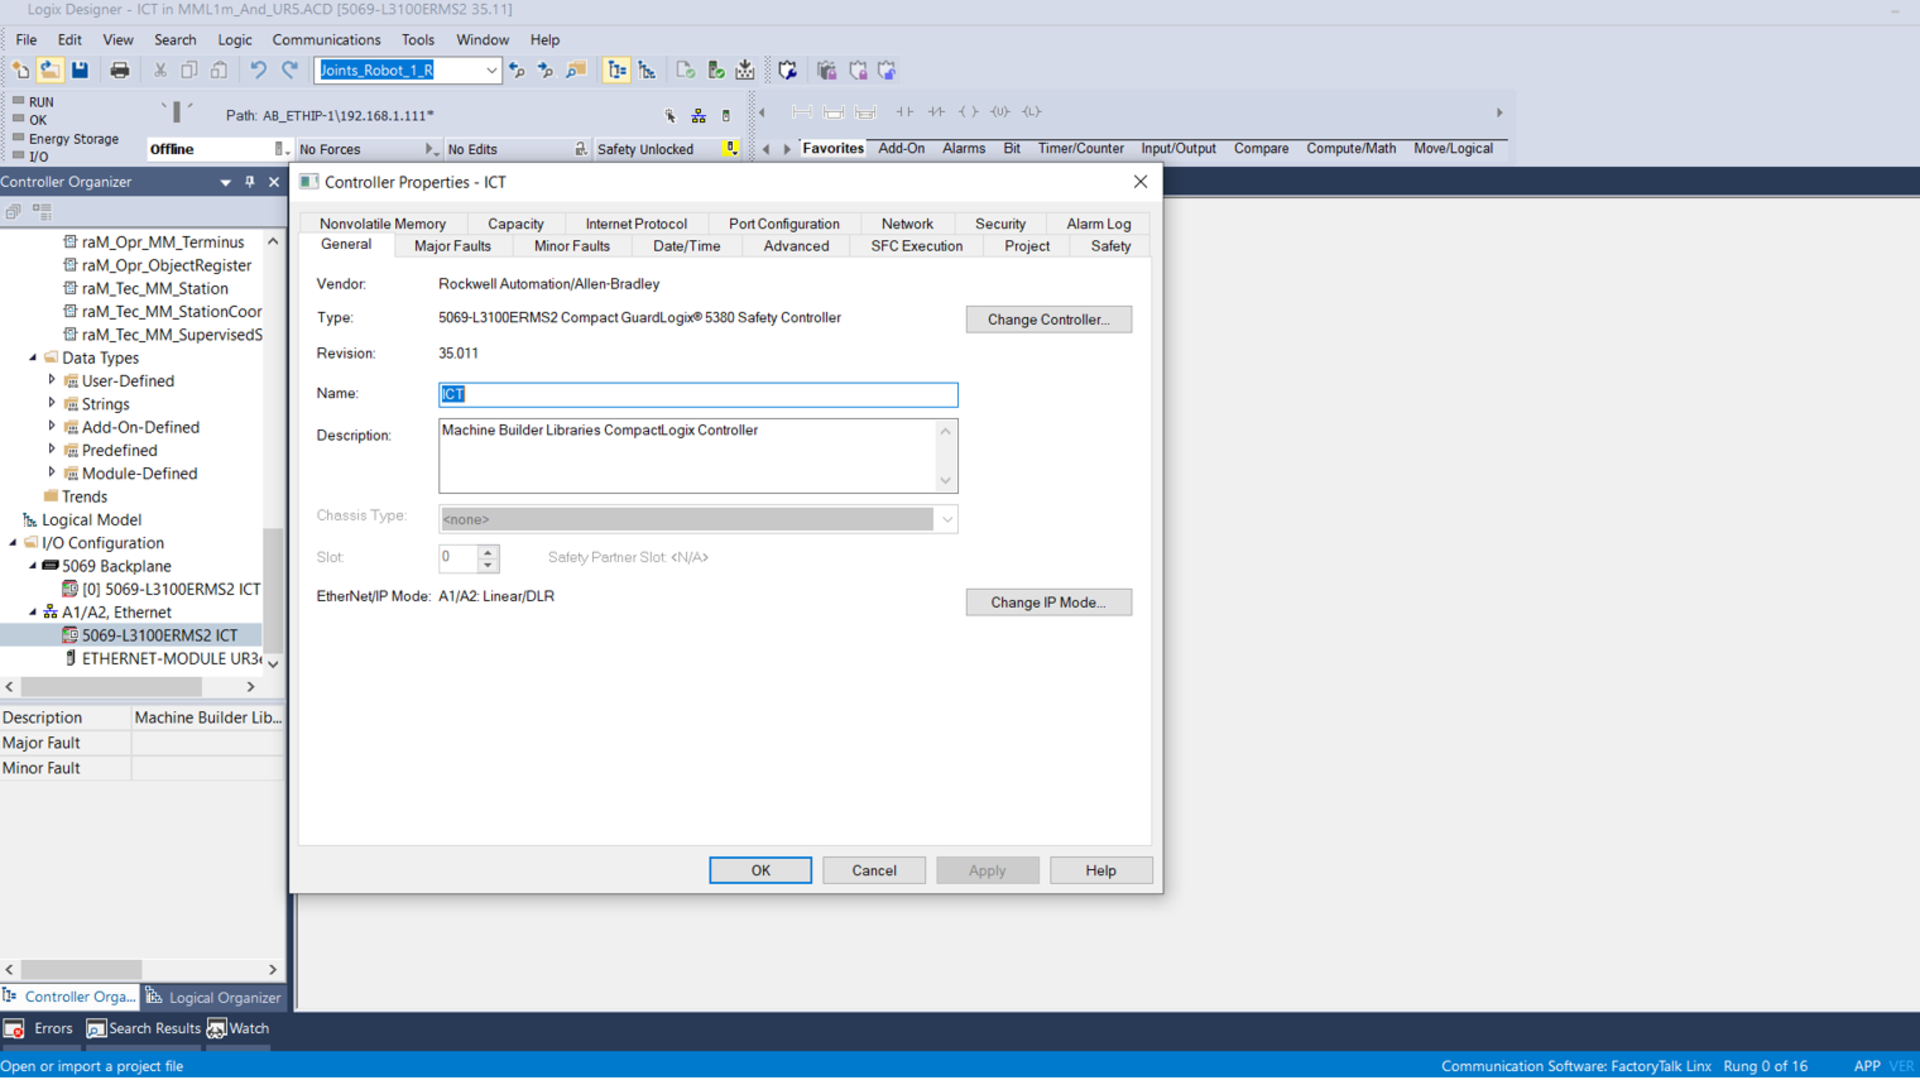
Step 5
Validate the connection of each part of the system through pings in Command Prompt. After that, change the IP address of the components in Emulate3D.
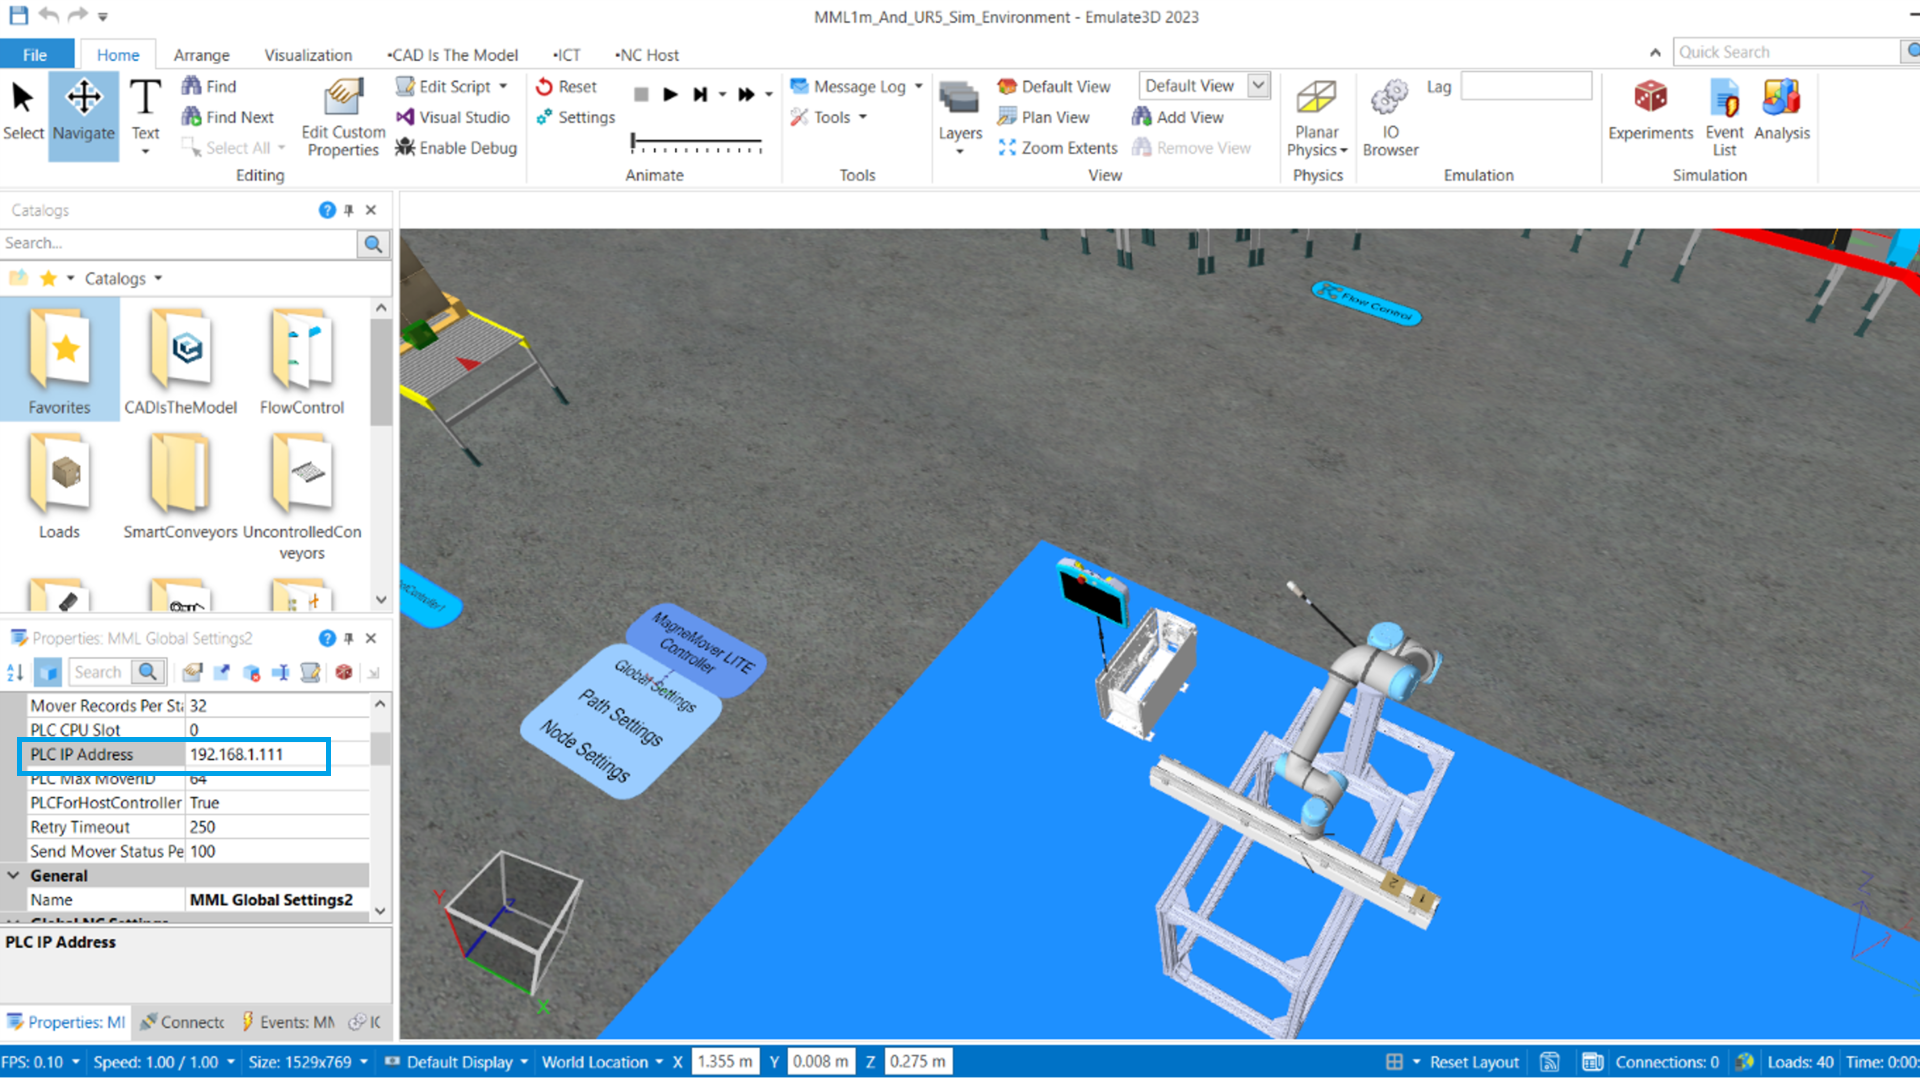
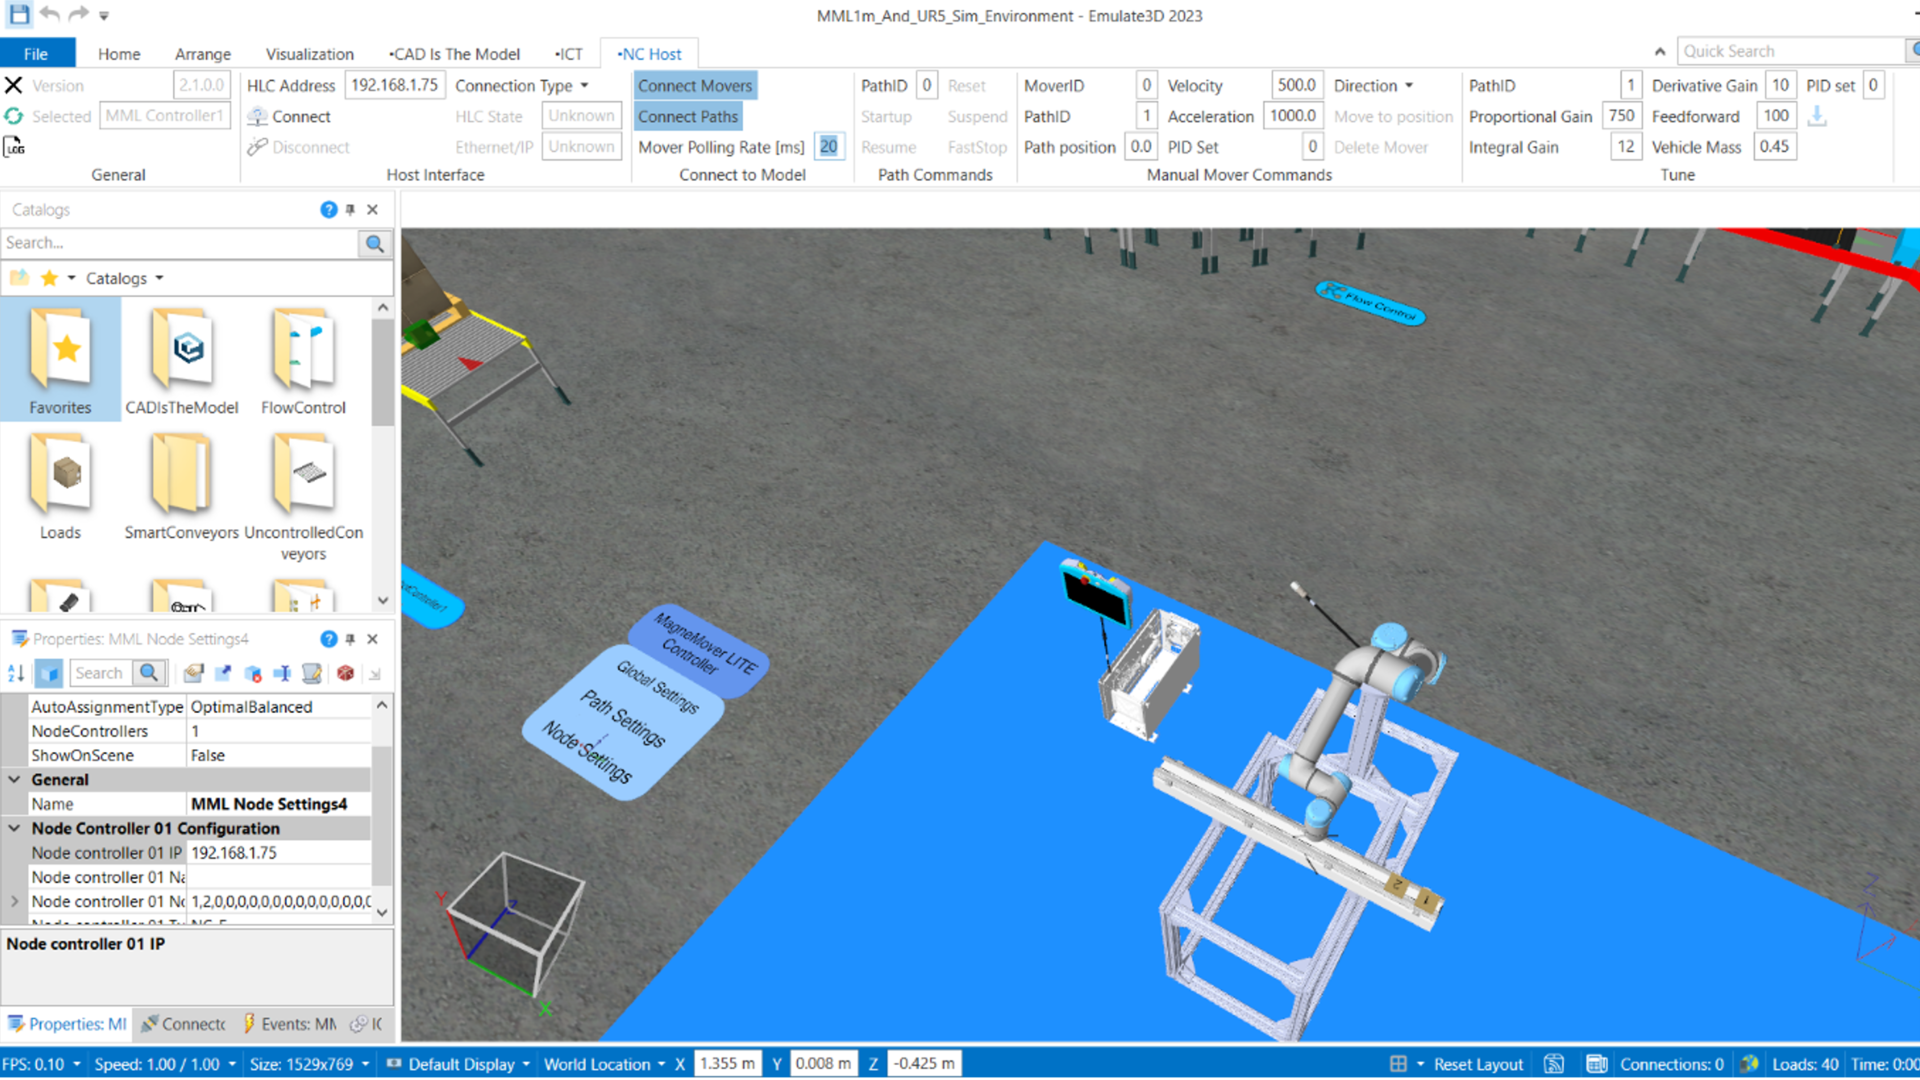
5.1 Click on Global Settings of the MML controller and change the PLC's IP address.
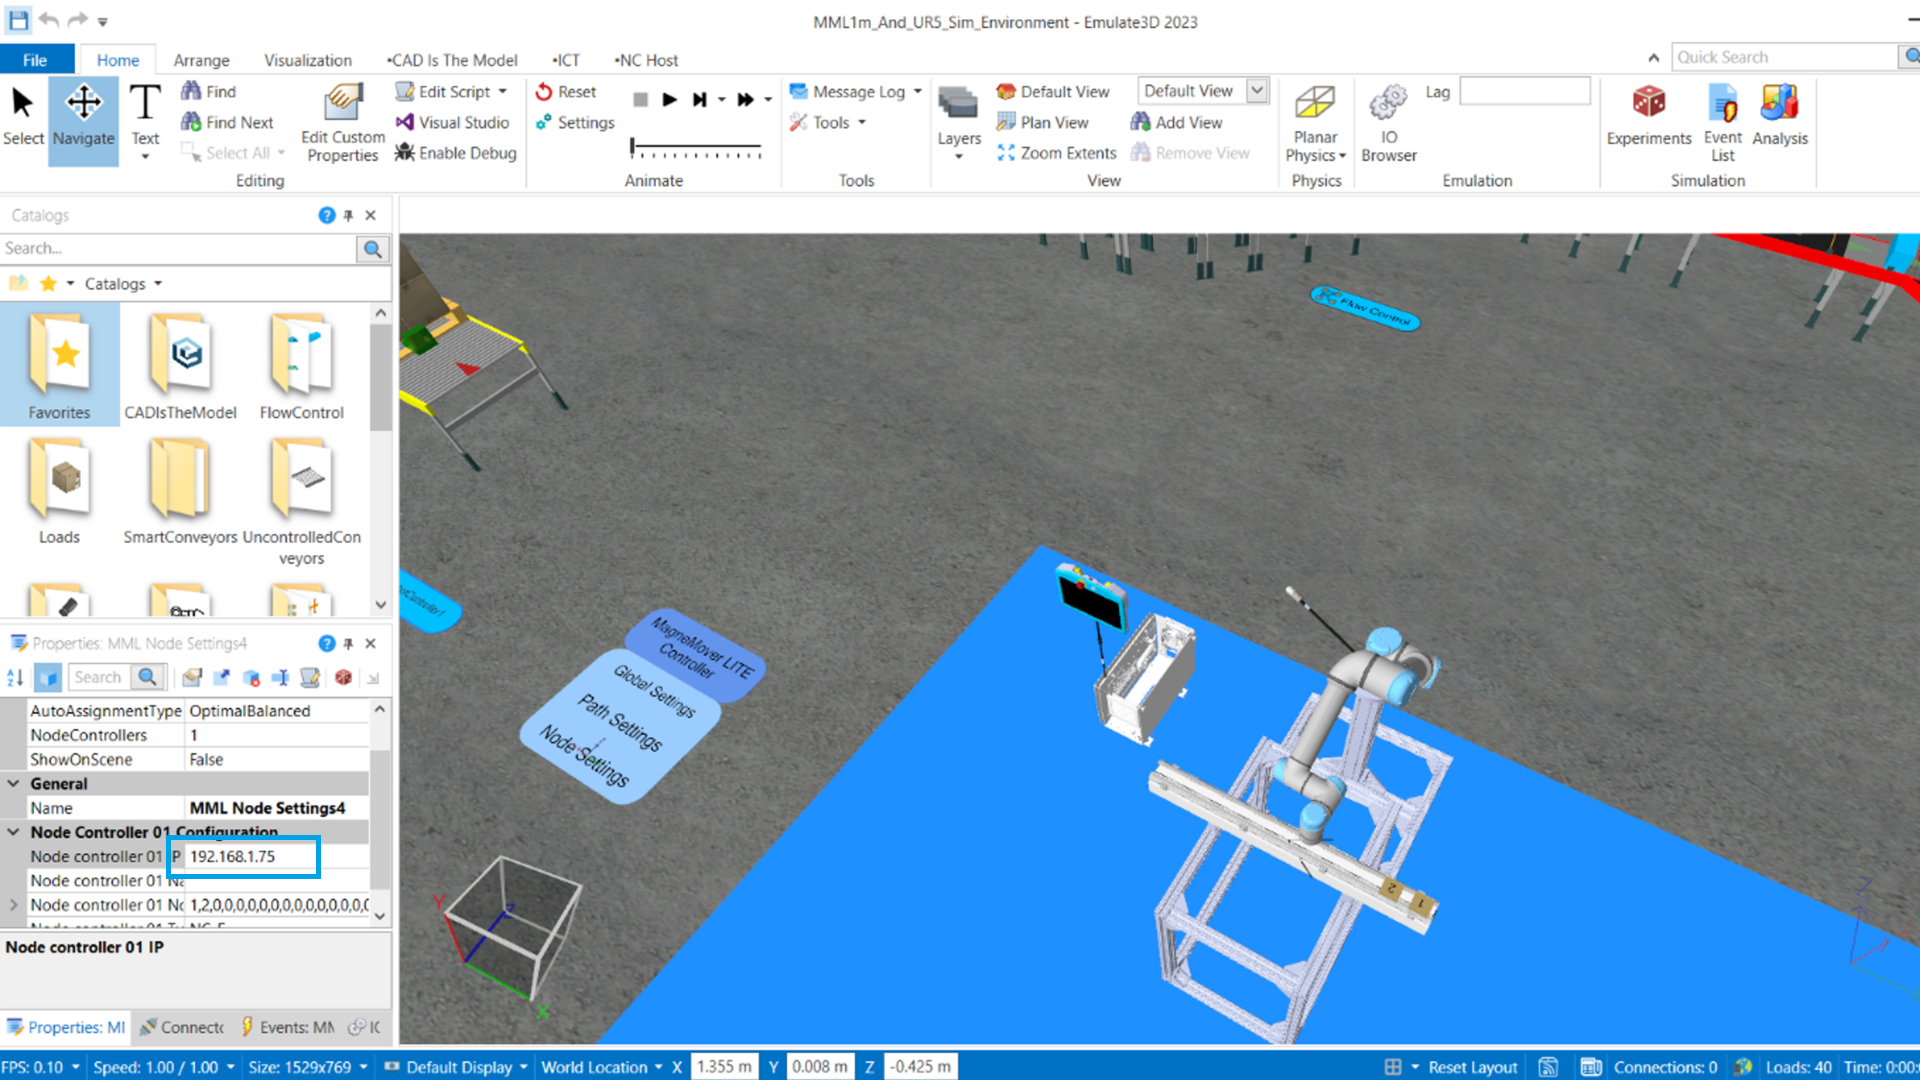
5.2 Click on Node Settings of the MML controller and change the node controller's IP address.
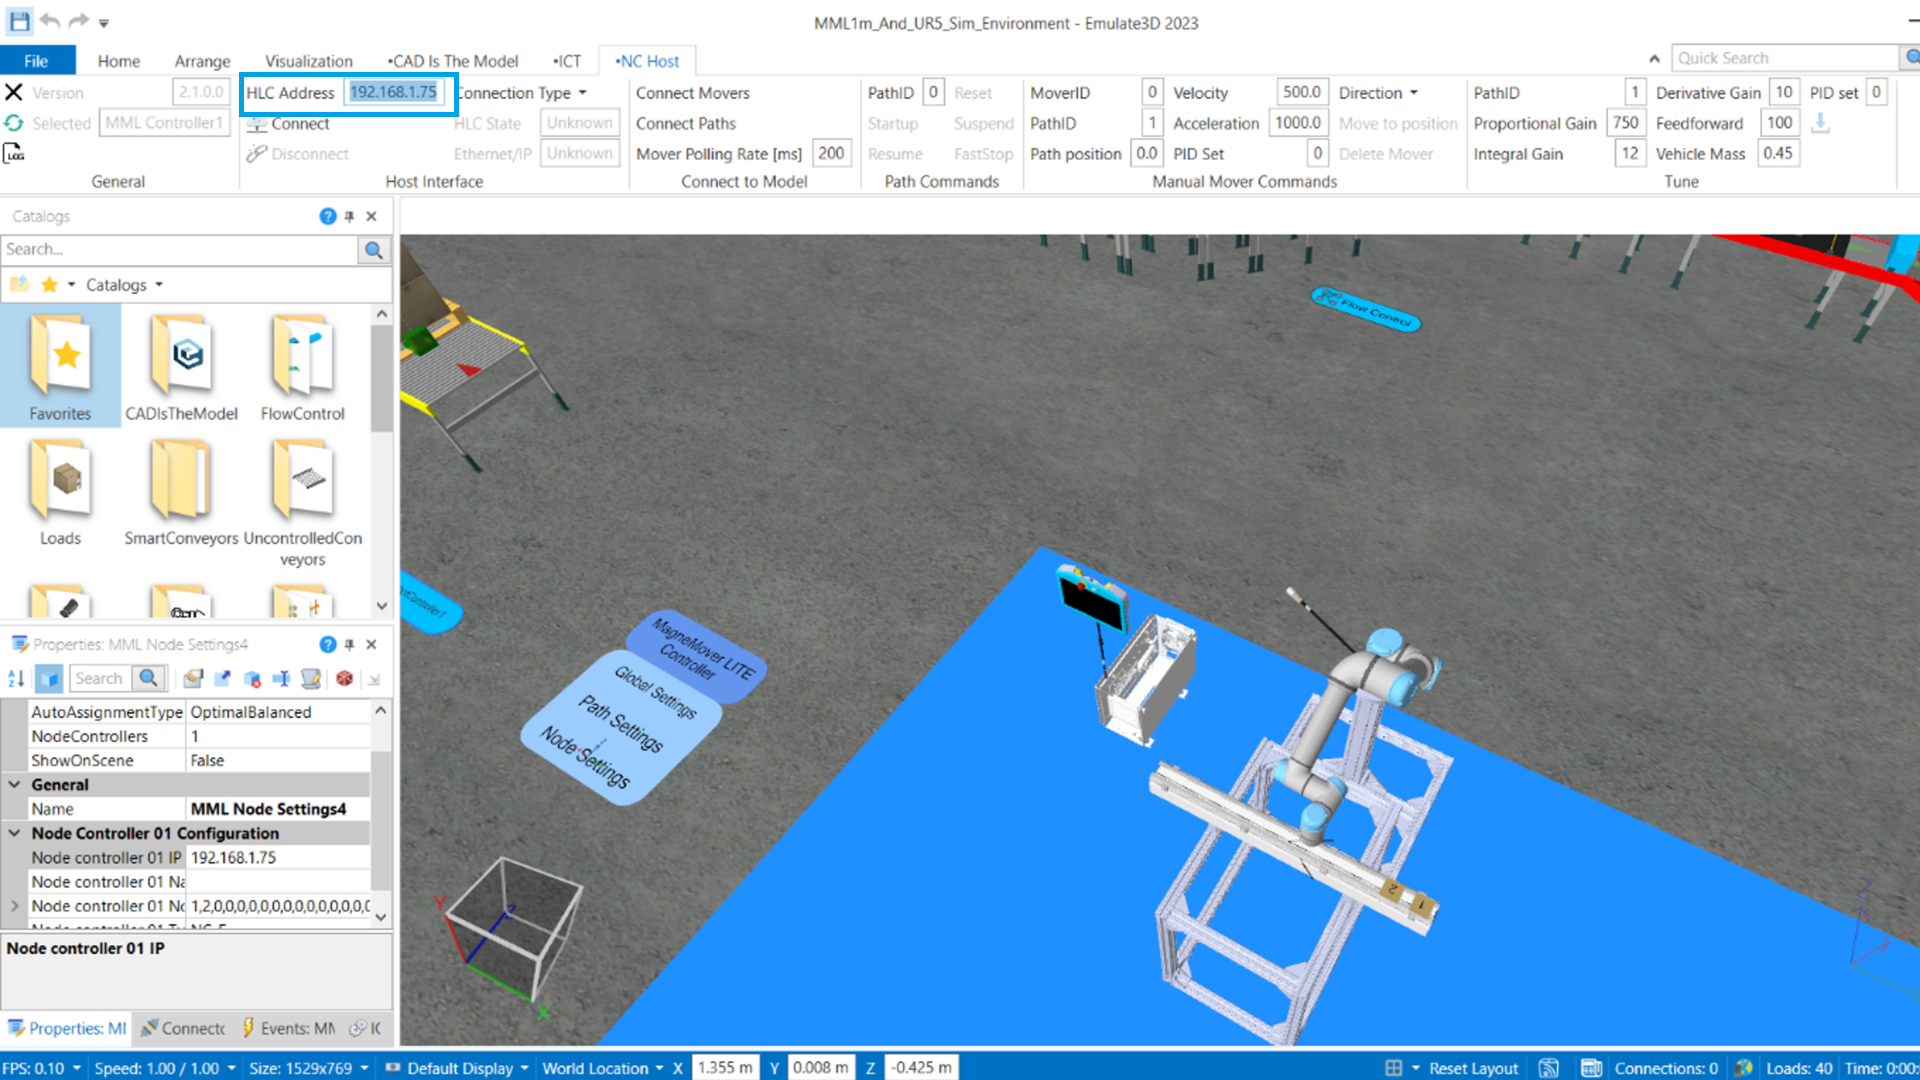
5.3 Change the HLC address in the NCHost tab to the node controller's IP address.
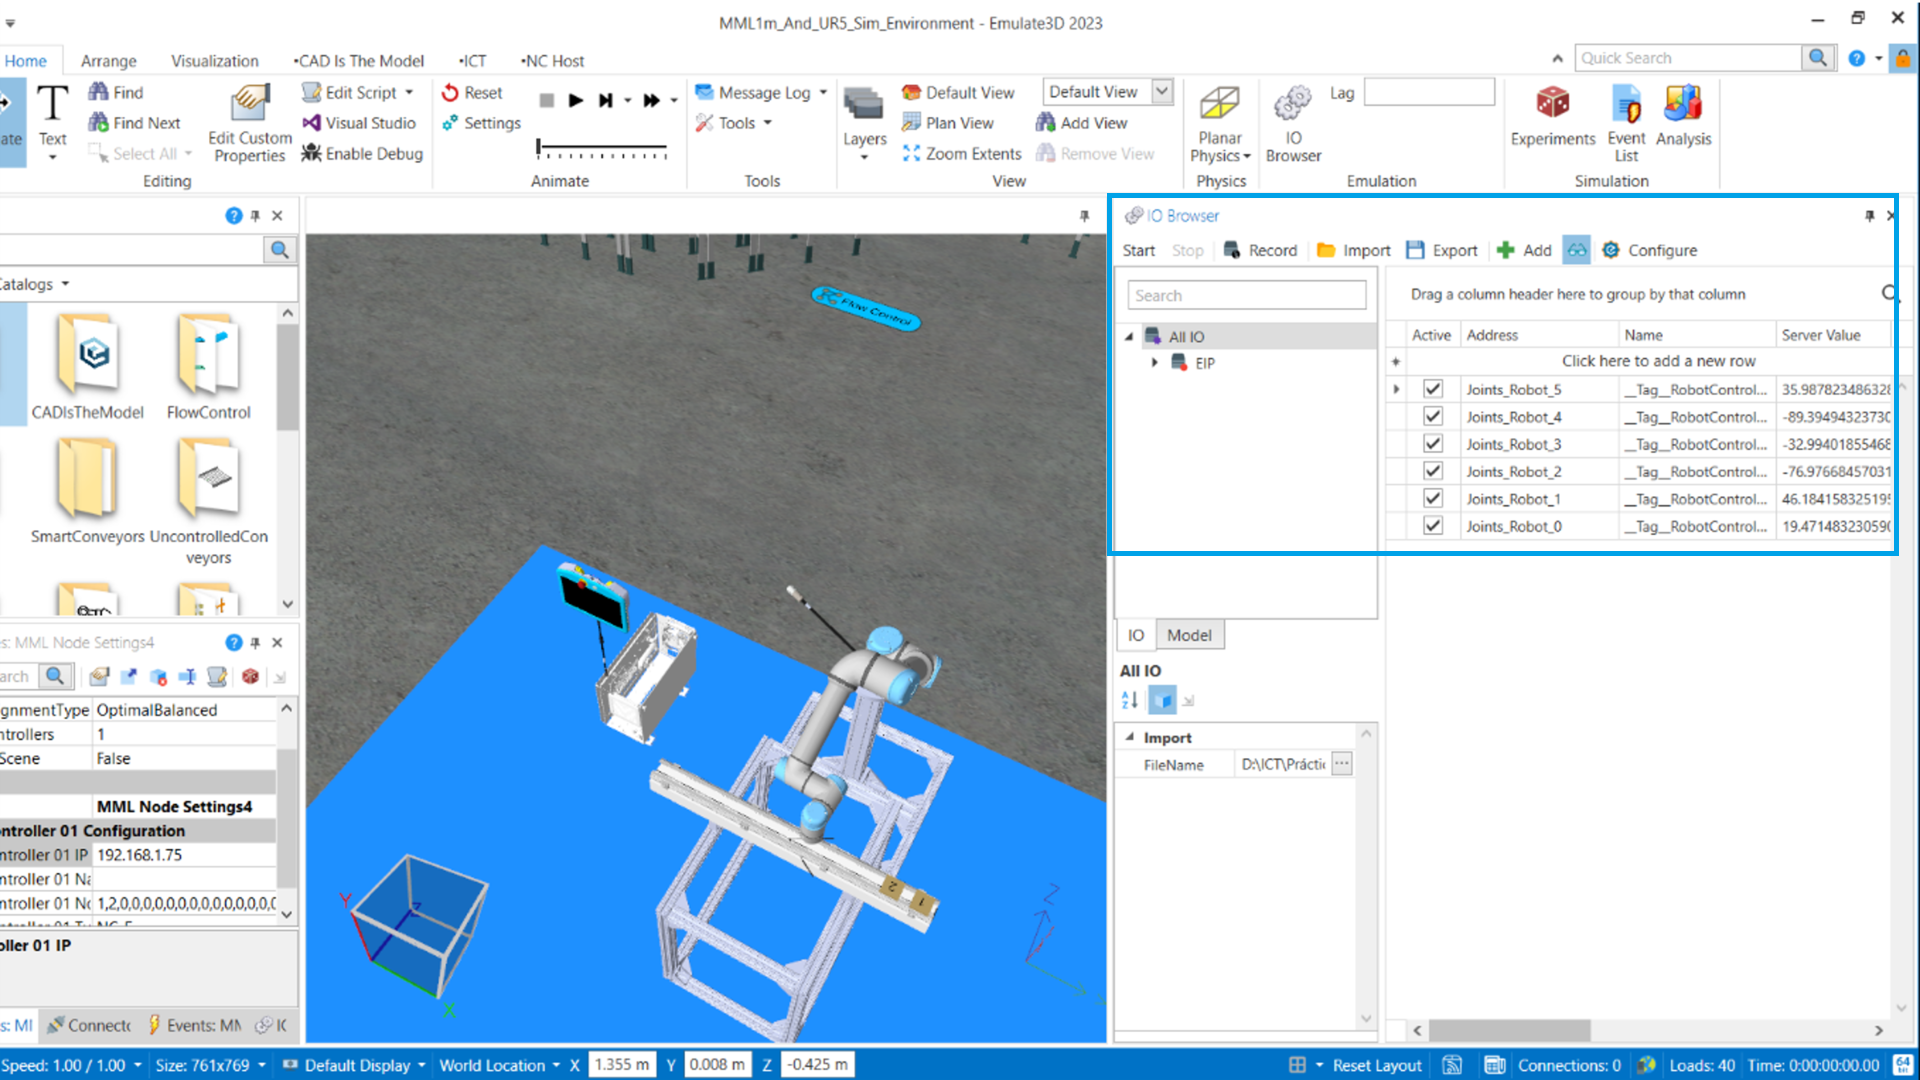
Step 6
Click on IO Browser and import the tag configuration from the shared Excel file.
Step 7
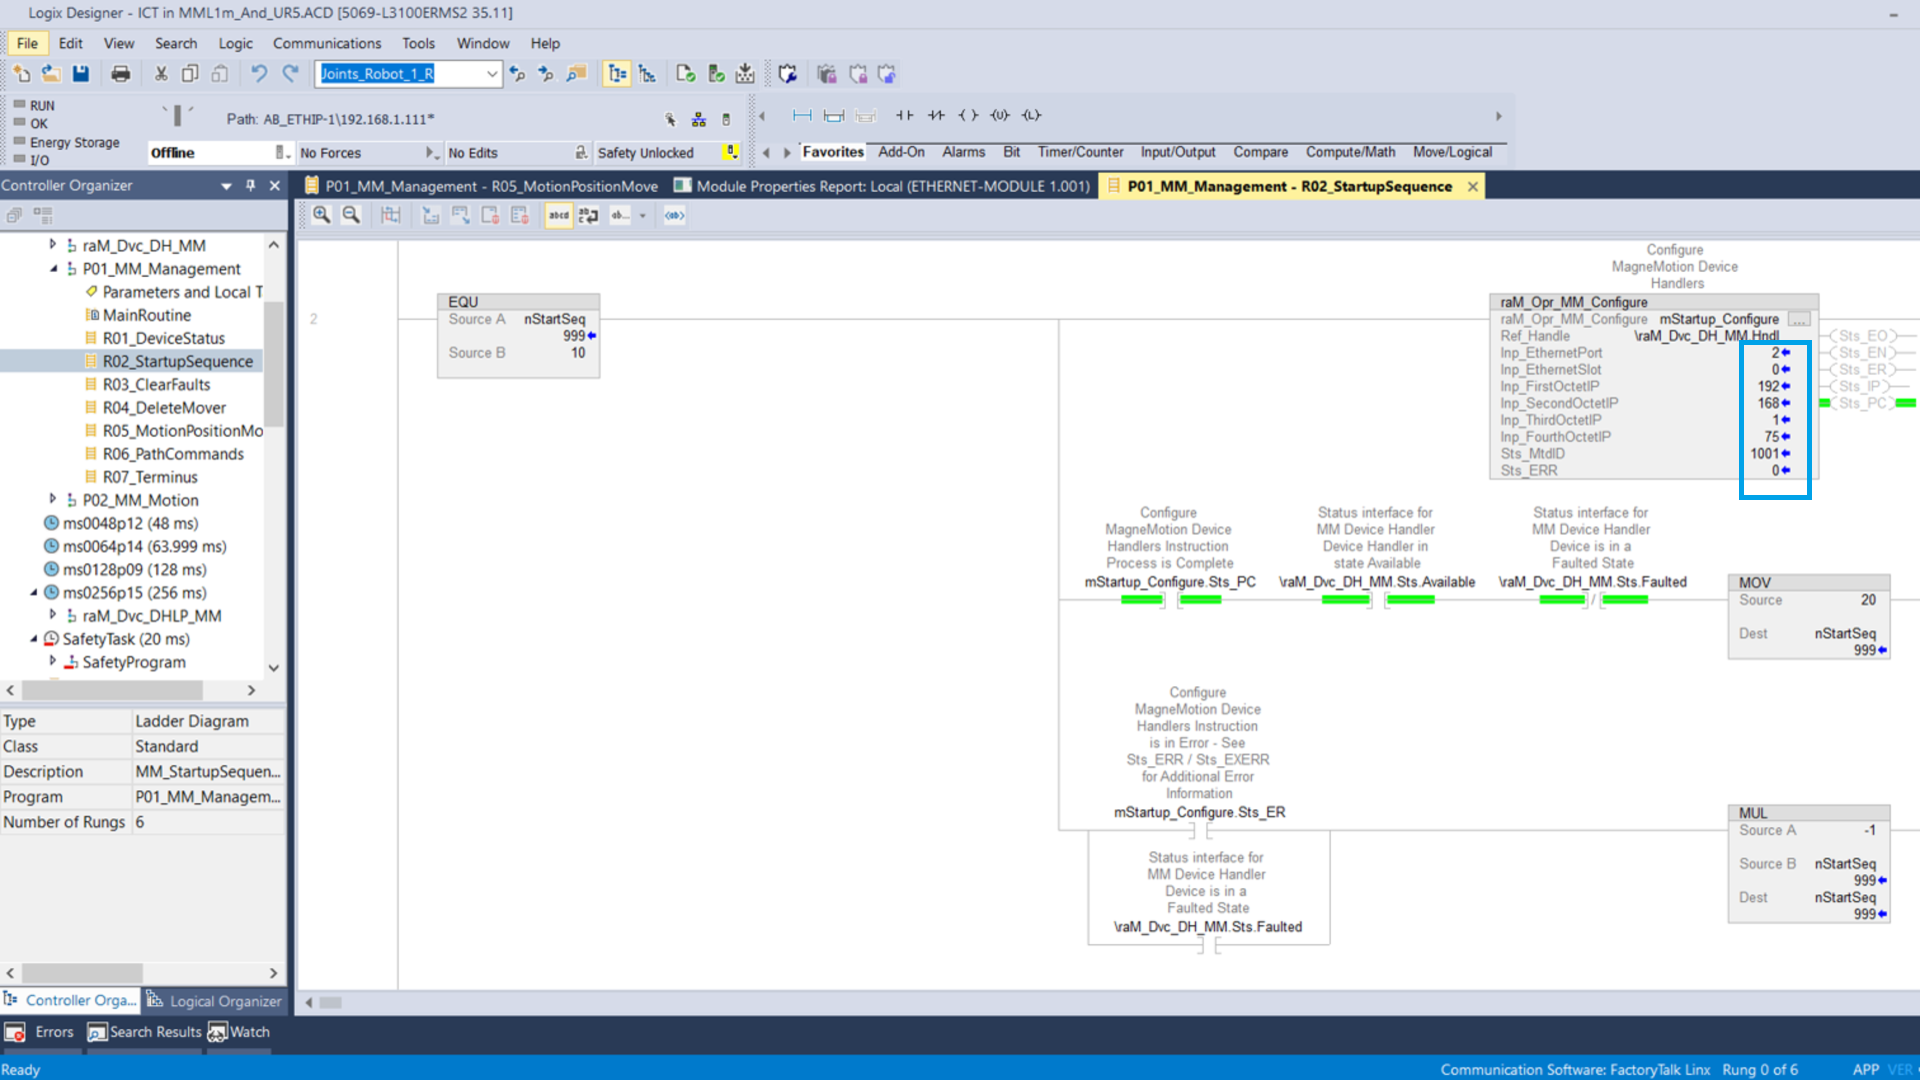
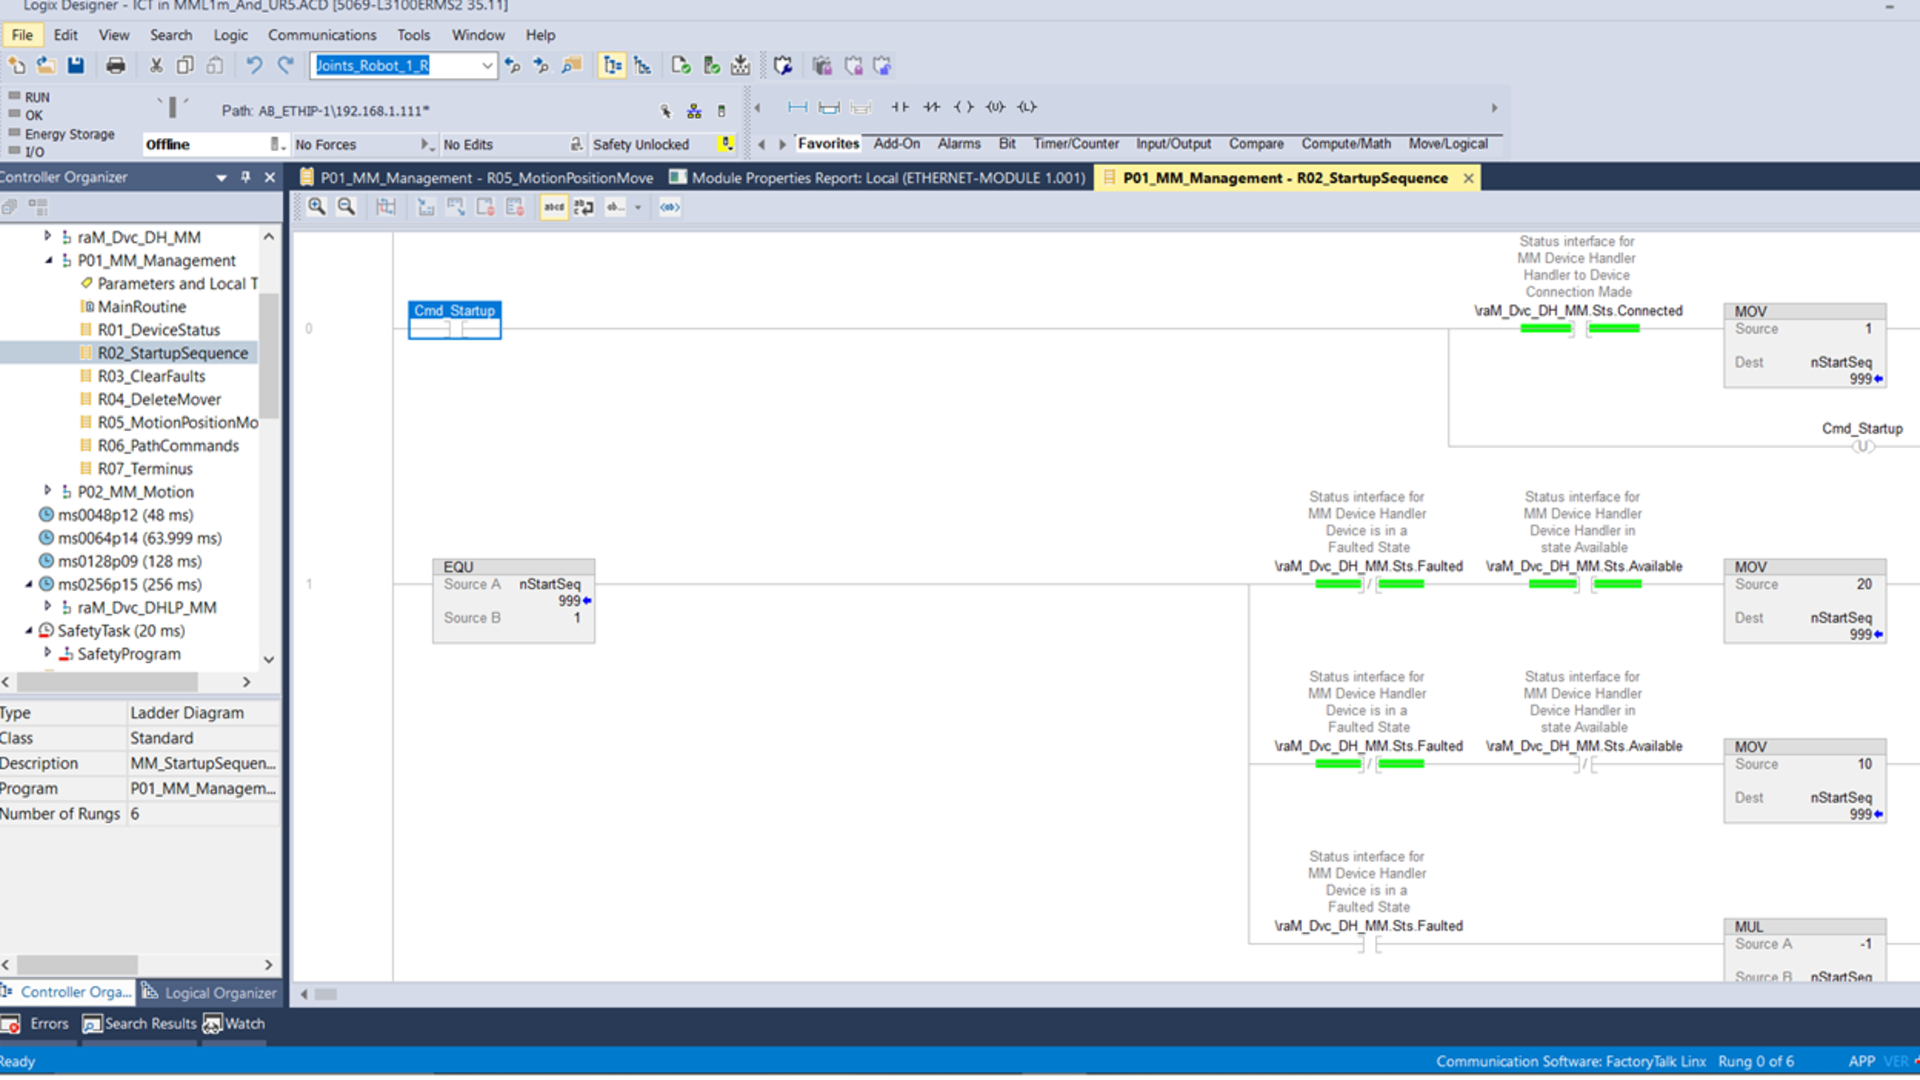
Open the attached Studio 5000 project and locate the "R02_StartupSequence" program with the path: ms0016p10: P01_MM_Management.
Change the IP address of the node controller in line 2.
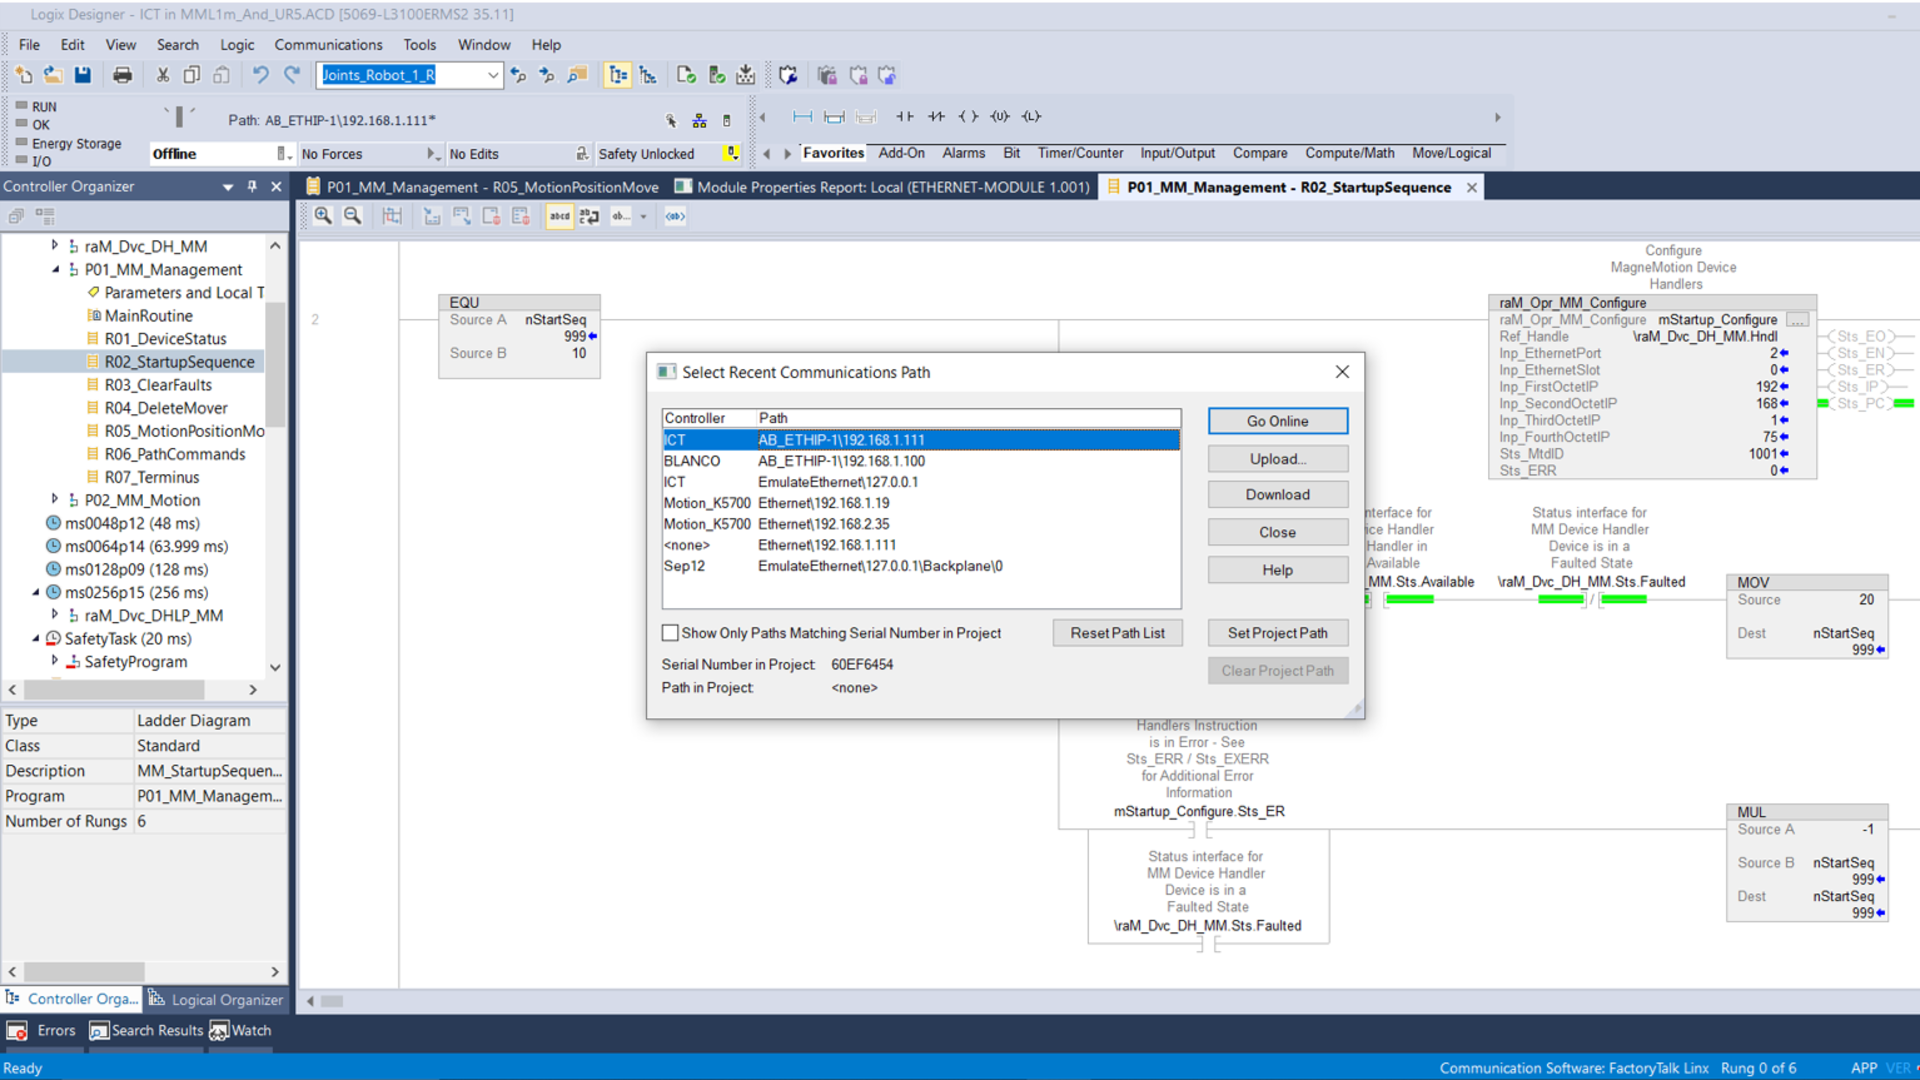
Step 8
Download the Studio 5000 project to the PLC controller and select Run Mode.
Step 9
In the same program, apply a Toggle Bit to Cmd_Startup to initialize the MML motor and wait for the nStartSeq value to be 999 to validate the initialization process.
Step 10
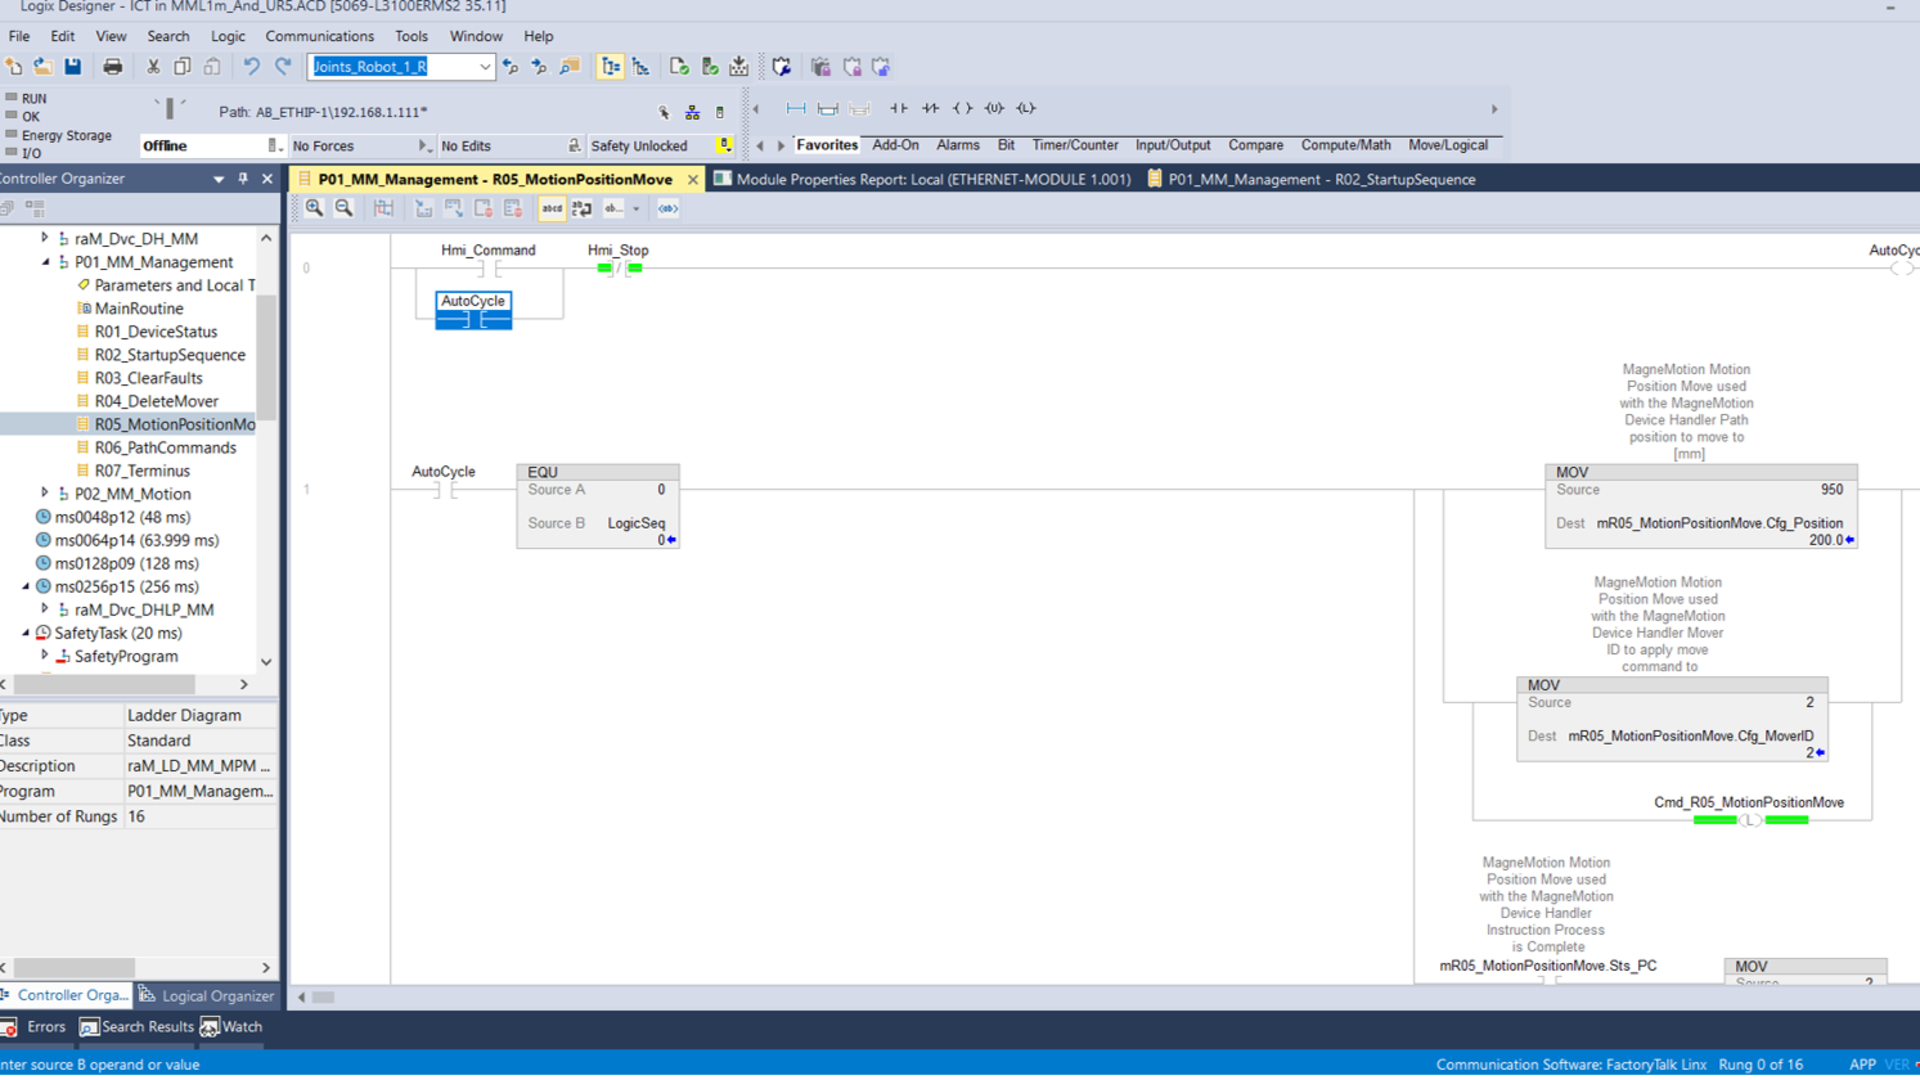
Enter the "R05_MotionPositionMove Program" program in the same path and apply a Toggle Bit to "AutoCycle." This will start the MML system's motion program. In this program, the vehicular motion sequence can be edited.
Step 11
11.1 Open the Emulate3D model and verify that the connection type in the NC Host tab is Status.
11.2 Select Connect under the HLC Address section.
11.3 Select the MML controller and in the NC Host tab, select Connect Movers and Connect Paths.
11.4 Change the Mover Polling Rate for smoother movements by decreasing its value.
Step 12
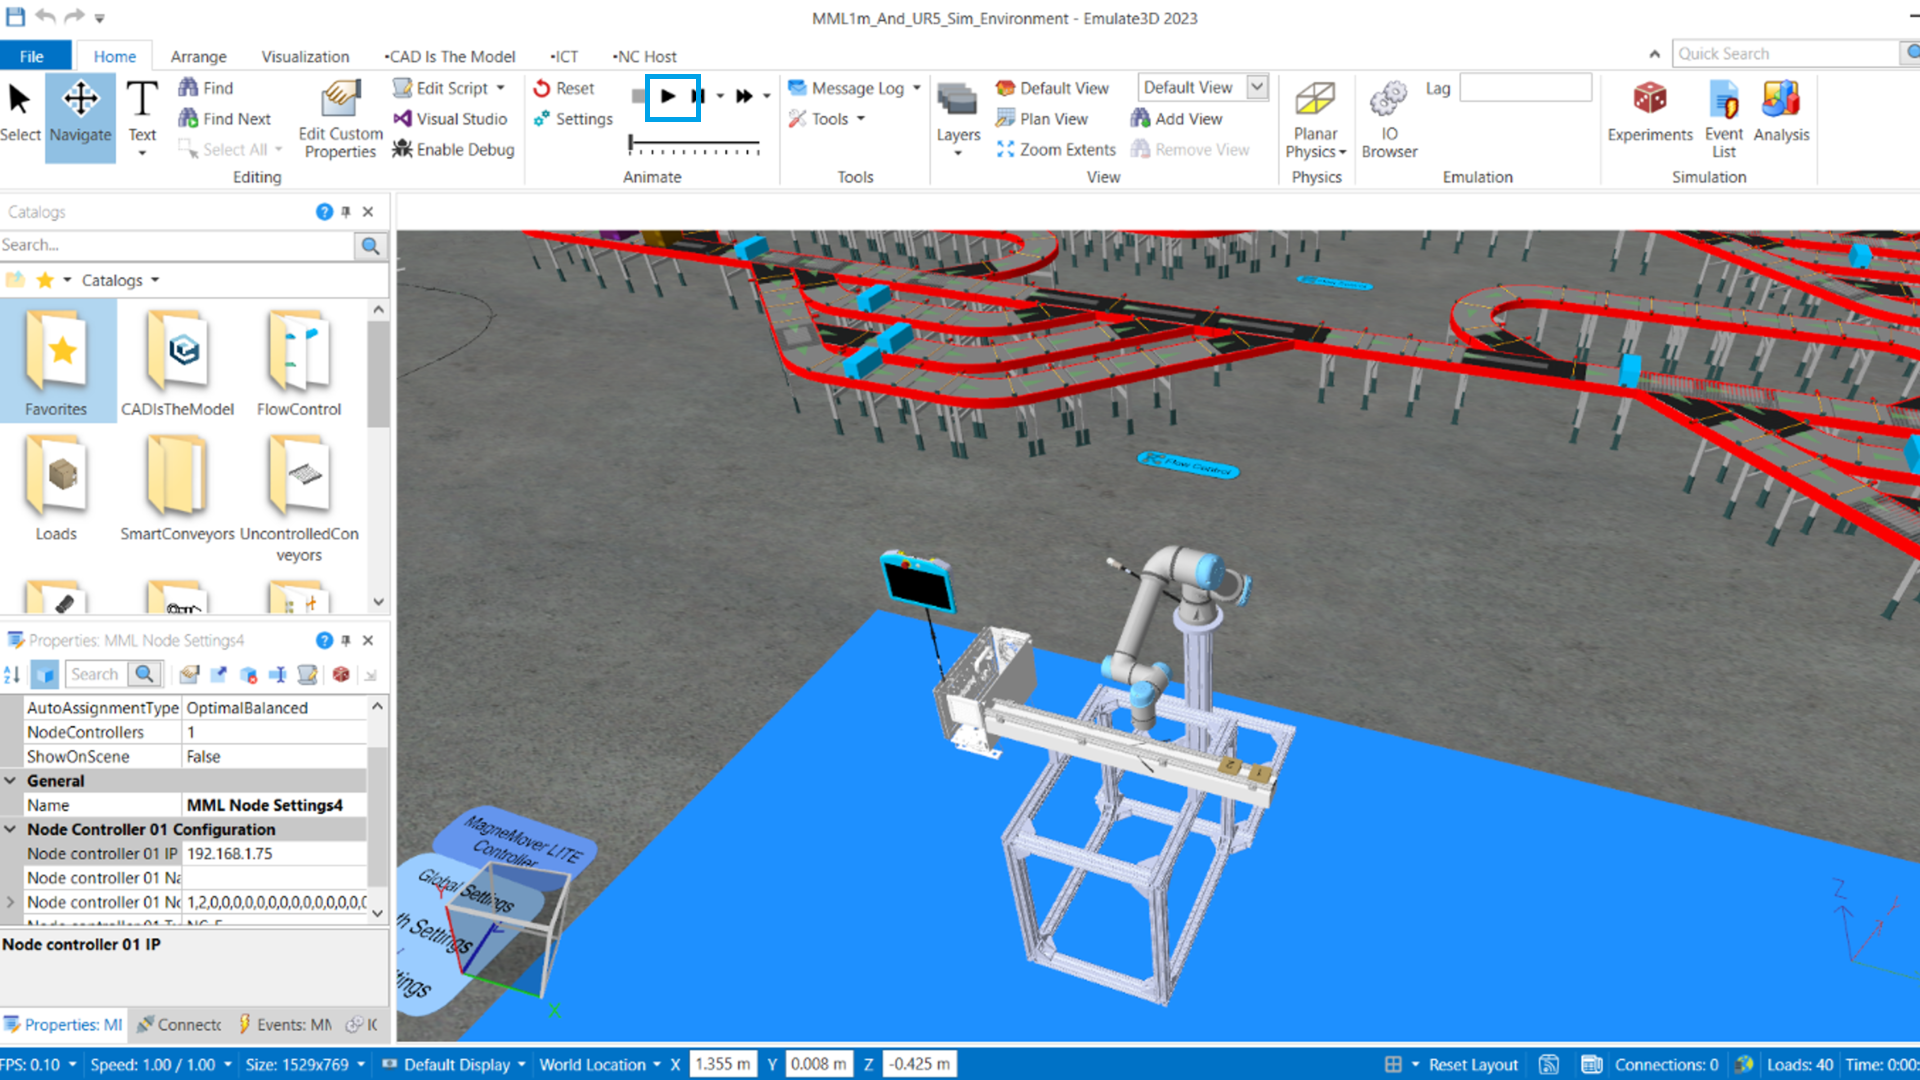
12.1 On the Home Tab, select the play icon.
12.2 Verify that the components move correctly. If the cobot is in a different static position, repeat Step 7 and check the PLC connection in IO Browser to the digital model.
