Downloads
What is this for?
Flying shears are used in a variety of industries like Glass, Plastic & Rubber, fiber, etc to cut product to specified lengths. Their unique design allows product to be cut on the fly as it moves past the shear Productivity is optimal because the belt never stops during the cut.
Is this useful for me?
The Master Axis (conveyor) may be servo driven, to synchronize speed and position with the slave Axis, an encoder is mounted on one of the Master axis’ (conveyor) drive rolls. This encoder becomes a feedback only axis in the Motion controller.
The Slave Axis is typically servo driven. Its speed and position are synchronized with the Master Axis (conveyor) during the cut.
The Shear Axis (perpendicular with conveyor) may be servo driven. Less costly system may use open loop pneumatic or hydraulic cylinders to traverse the Shear across the cut zone. In these open loop applications, programmers use on delay timers to allow enough time for the cut.
The entire slave/shear assembly is typically raised during the retract move to prevent the knife from cutting the belt. Accuracy for raising and lowering the assembly isn’t critical; therefore servos aren’t used for this operation.
How can I make it work?
- Studio 5000 (V30 – V35)
- Kinetix Over Ethernet
- Knowledge of Motion Control.
Please note: You will need to agree to the Terms & Conditions for each download.
Need help?
If you need help with an application or have feedback from the Innovation Center, please contact us.
Installation Guide
Step 1
Open the Studio 5000 project that you downloaded from the Downloads section of this page.
Step 2
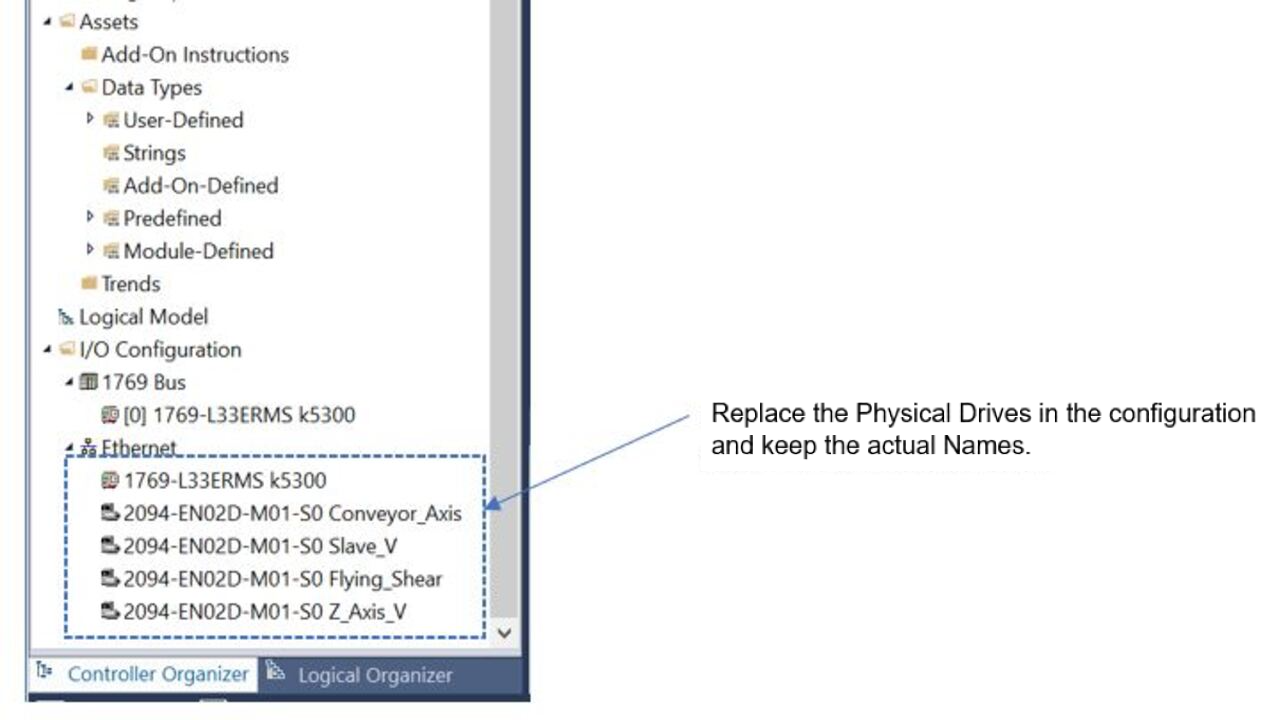
Replace the Physical Drives in the configuration and keep the actual Names.
Step 3
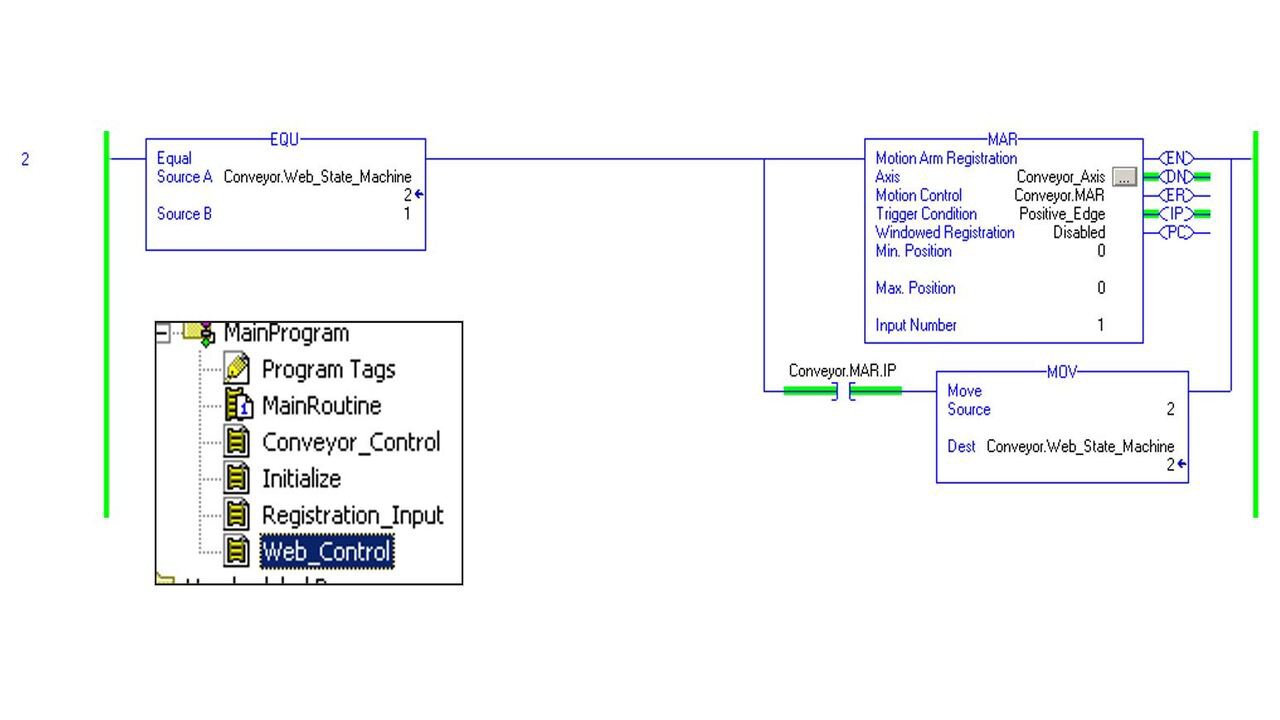
Rung (2) in the Web Control Routine is used to detect the product registration mark. Its .PC bit advanced the State Machine after the event is captured.
Step 4
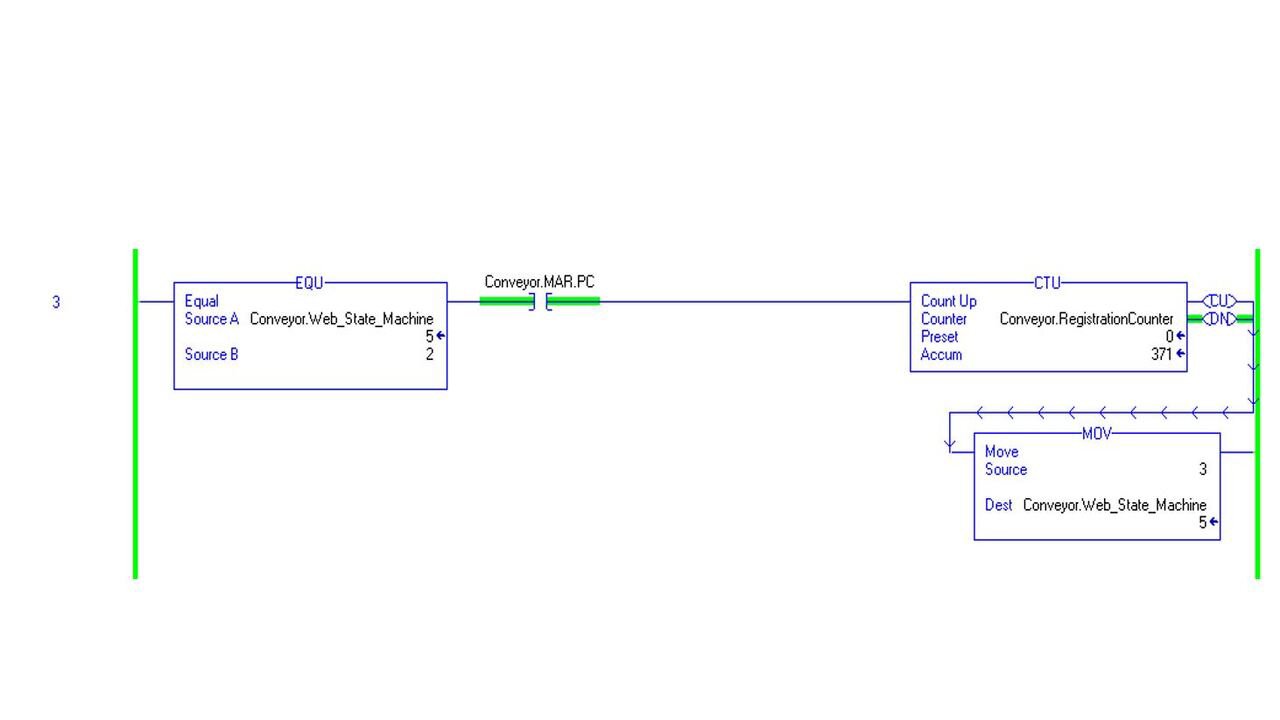
Rung (3) isn’t required. It’s included to count registration events for diagnostics.
Step 5
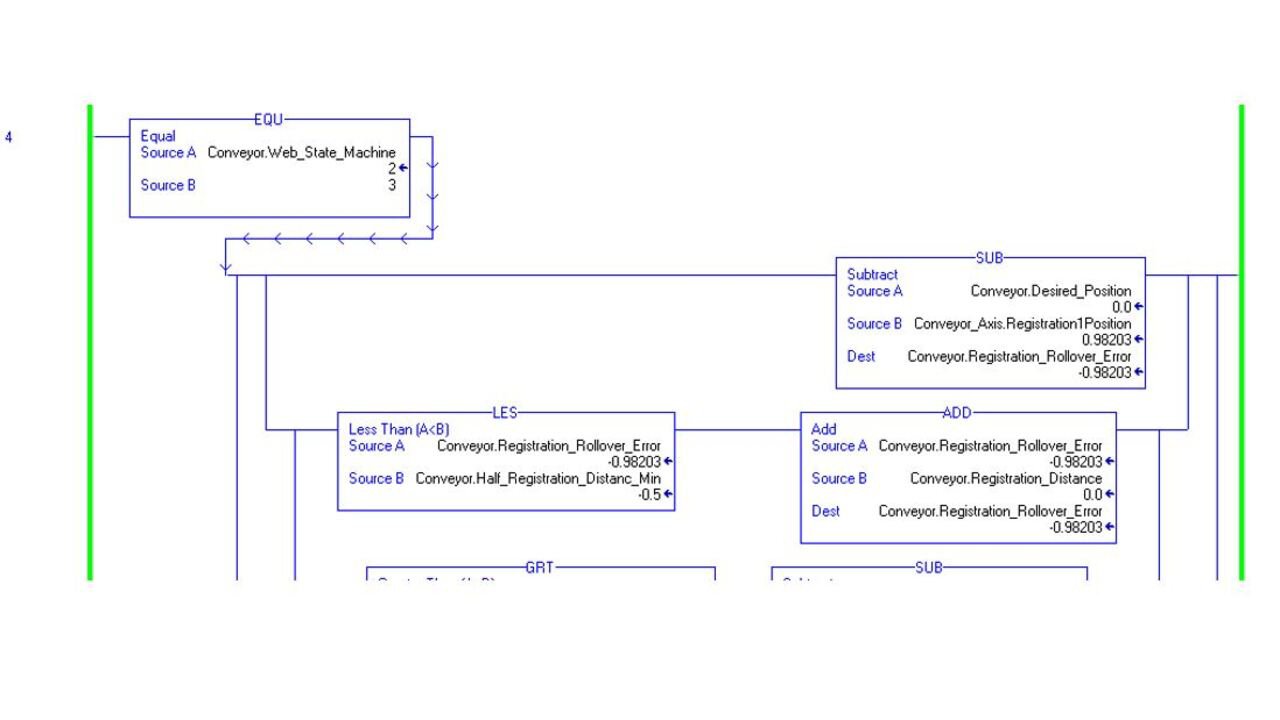
Rung (4) isn’t used in this lab. It can be employed on an actual machine to compensate for mechanical inaccuracies or for product slippage (i.e. registration mark doesn’t occur at the axis rollover point).
Step 6
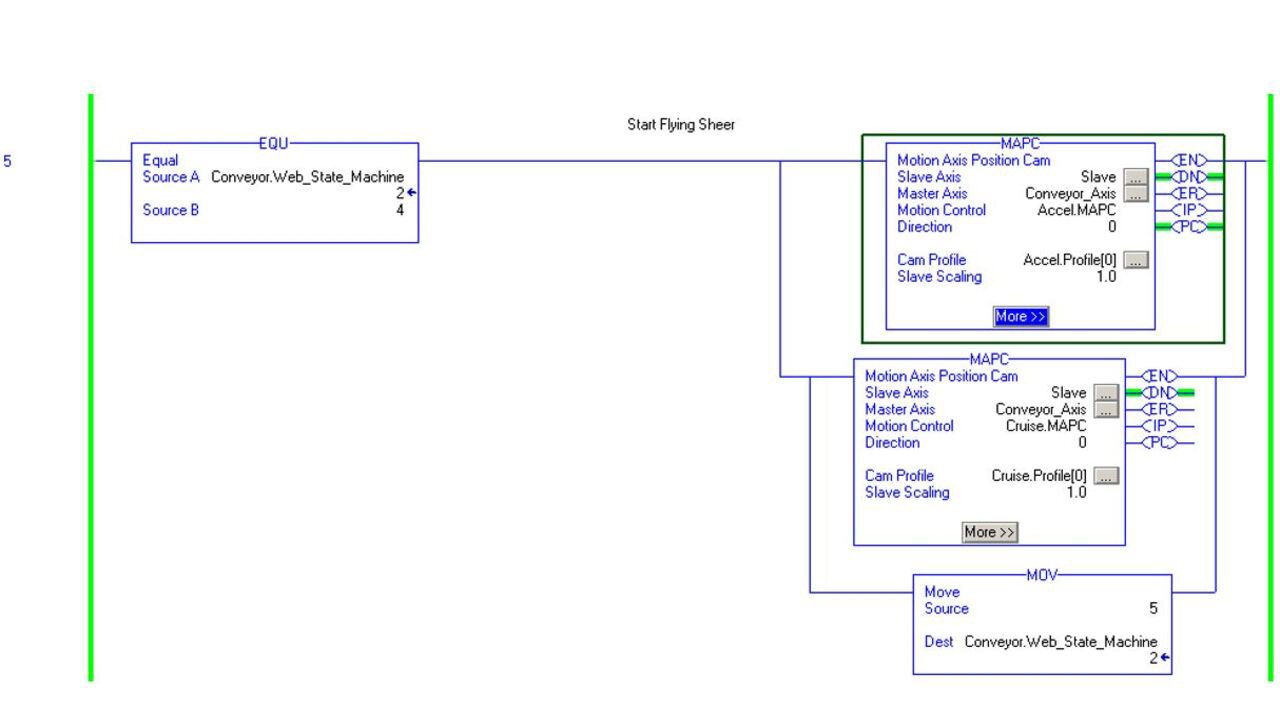
Rung (5) starts the flying shear. It consists of (2) MAPC instructions. Let’s examine each MAPC in detail.
Step 7
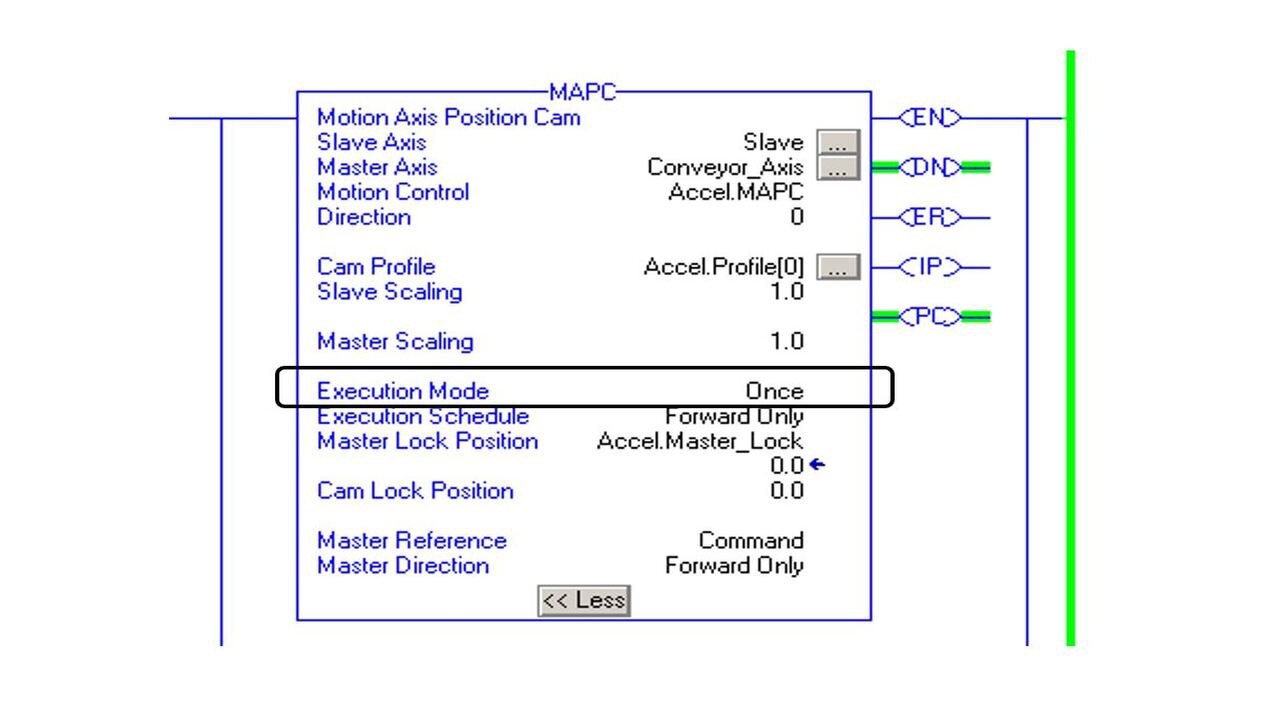
The first MAPC executes the Acceleration Cam Profile. It executes once, every time a product registration occurs.
Step 8
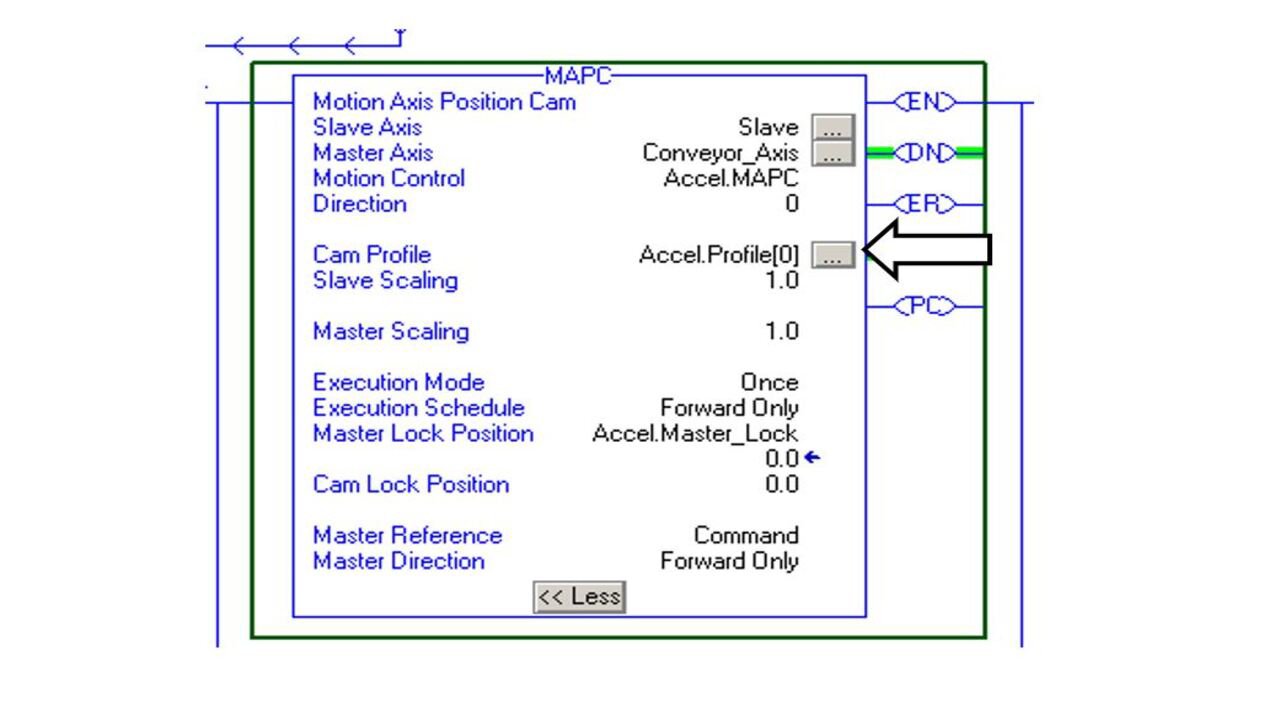
Click on the Cam Profile configure button.
Step 9
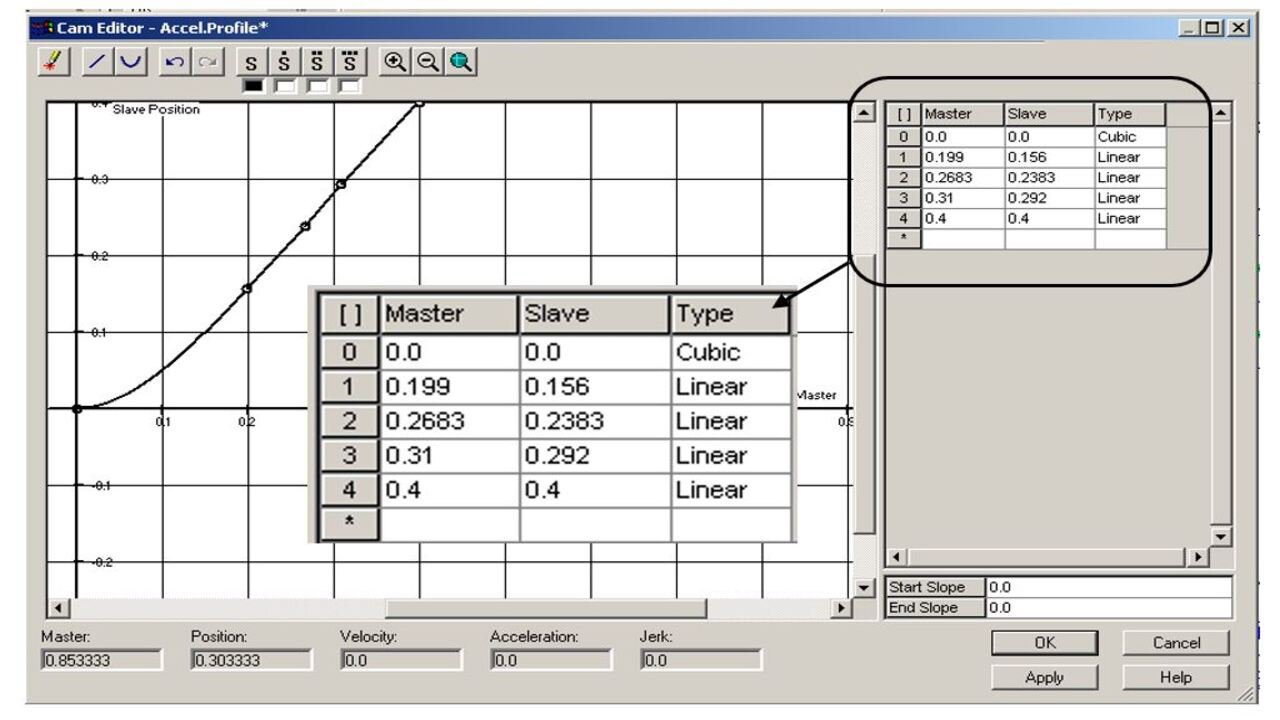
Update the Cam Profile according the values of your application. Click Apply and OK.
Step 10
Download and test the application.
