Add a COP function block, variables, and contact (MSG_CIPGENERIC)
Use the following steps to add a COP function block, variables, and a contact. The COP instruction is used to convert data from the source data type (for example, DINT or REAL) to the destination data type. In this example, the catalog information is converted to a human readable string.
To add a COP function block, variables, and contact (MSG_CIPGENERIC)
- FromToolbox, drag
 to the ladder language editor under the first rung.
 - InToolbox, inSearch, enterCOP, and then drag it to the second ladder rung.
- Add local input variables for COP.
- InProject Organizer, under your program, right-clickLocal Variables.
- In the local variable gird, add variables according to the following table:Variables to be addedParameterVariable nameData typeSrcMyResDataArray USINTSrcOffset0UINTDestCatalogIDArray STRINGDestOffset0UINTLength1UINTSwapFALSEBOOLEAN
- For the CatalogID variable, double-clickDimension, and then change the array size to [1..1]
- Add a contact.
- InToolbox, in the search box, enterXIC, and then drag it to the left of the COP function block input on the second ladder rung.
- Right-click the XIC, and then selectSelect variable.
- In the local variable selector, selectConvert_String, and then selectSelect.
The second rung of your ladder diagram program for MSG_CIPGENERIC messaging looks similar to the following image: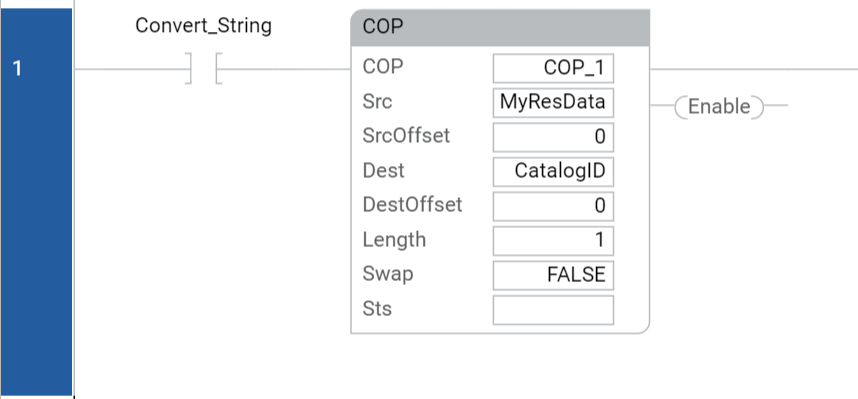
Provide Feedback