
Run the FactoryTalk Optix Project in Optix Panel Runtime
To run the
FactoryTalk Optix
project in the Optix Panel runtime, the user needs to configure the Optix Panel in FactoryTalk Optix
. Perform the following steps to configure the
Optix Panel
in FactoryTalk Optix
:- Click theEmulatordrop-down list and clickLocal.Drop-down Selection

- Click the [+] icon to add new target device.Add New Target Device
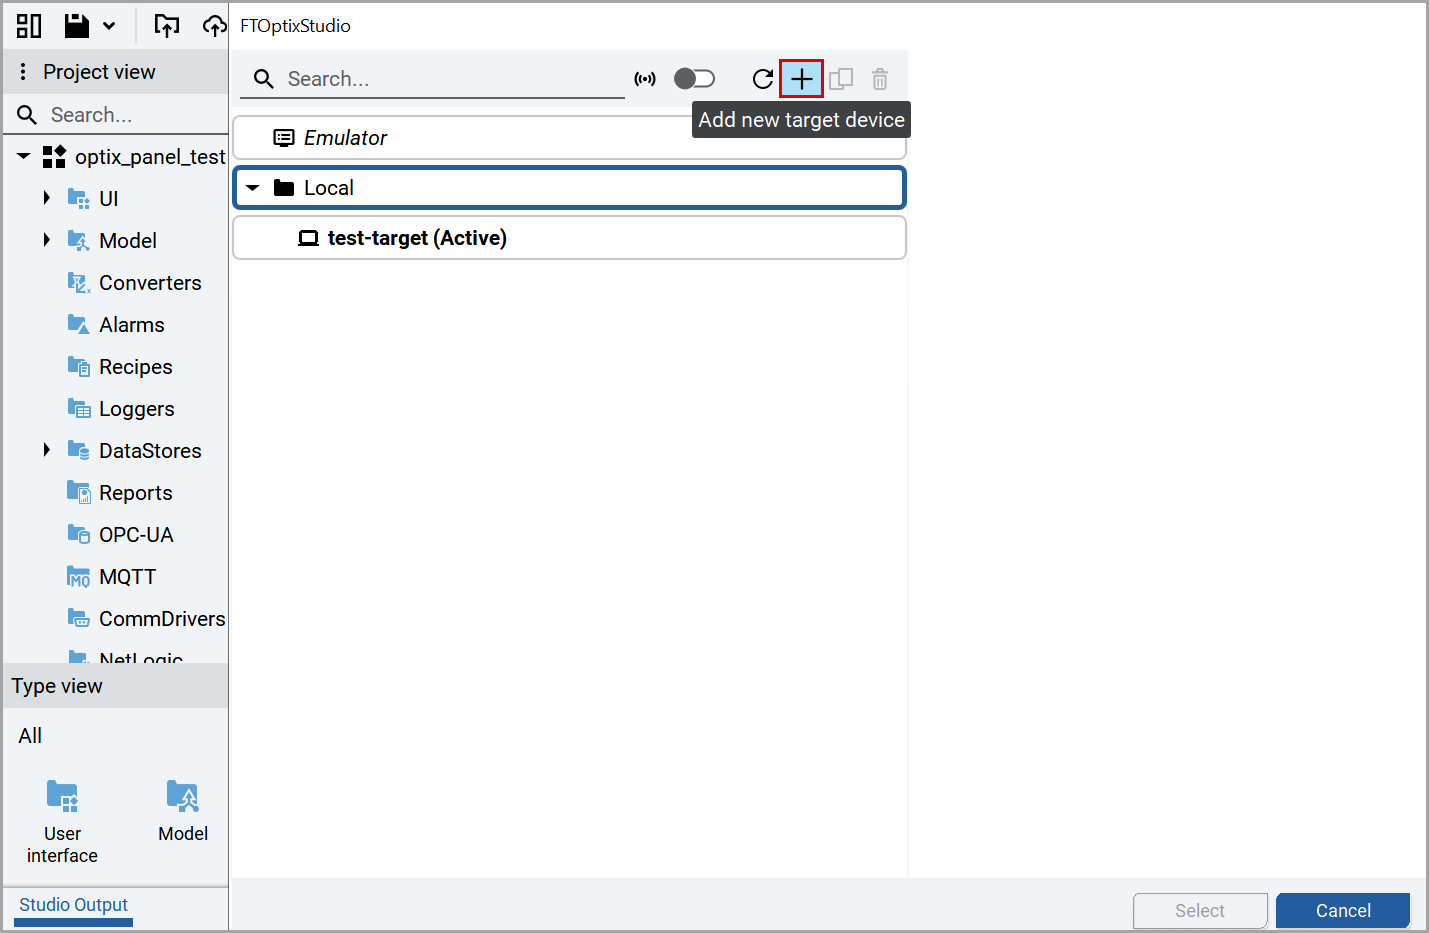
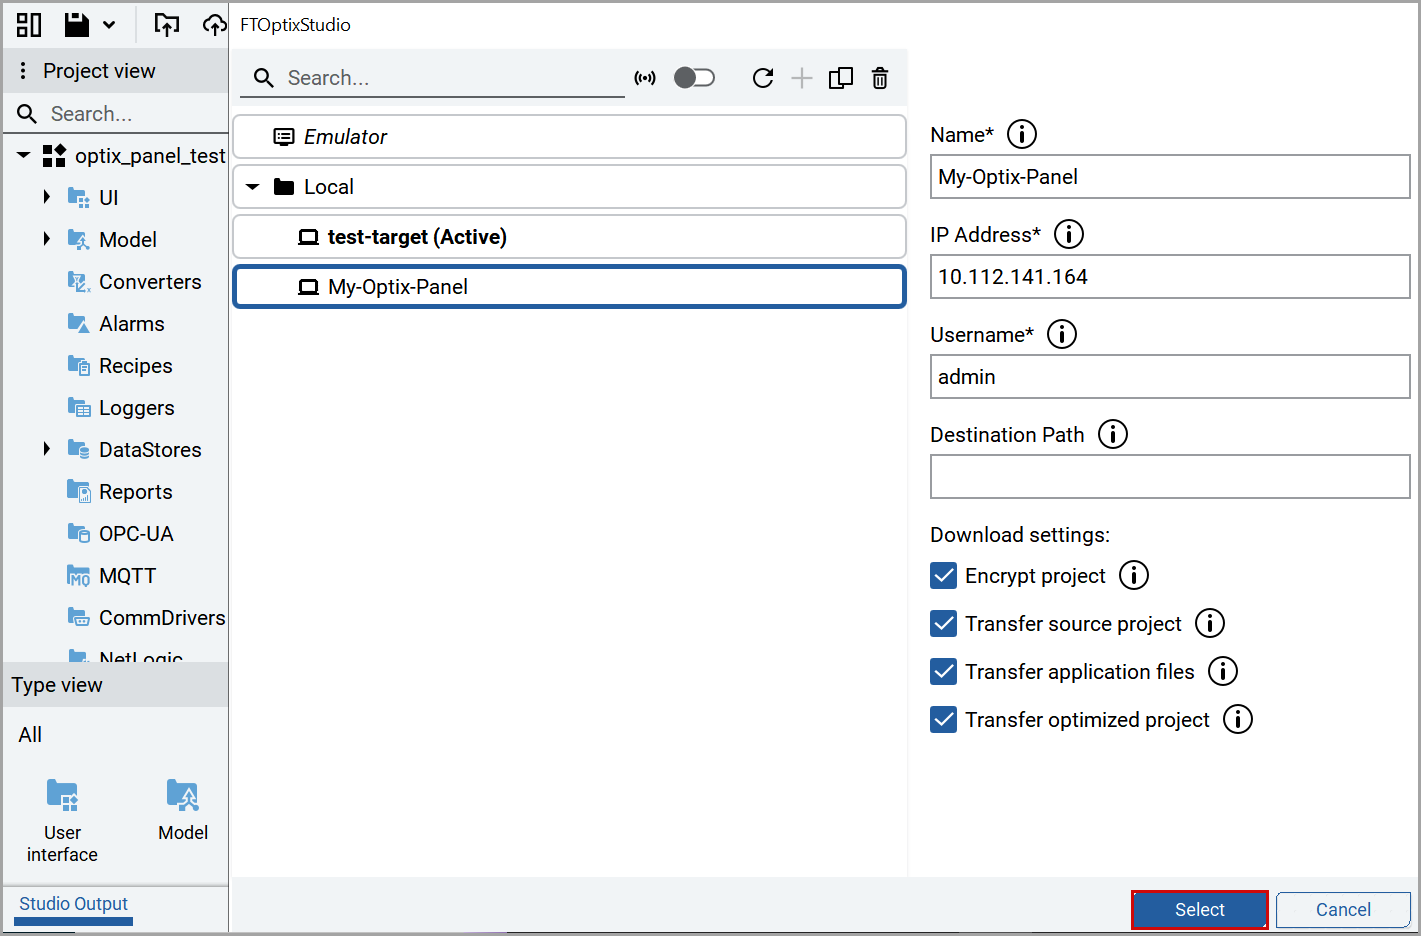
- Provide the following details:
- Name: Provide name of the target device.
- IP Address: Provide the IP Address ofFactoryTalk OptixPanel.
- Username: Provide the username ofFactoryTalk OptixPanel.
- (Optional) Destination Path: Provide the target device deploying destination path.
- Select theEncrypt project,Transfer source project,Transfer application files, andTransfer optimized projectcheckboxes.
- ClickSelect.FTOptixStudio Window
- Place theconfig.ymlfile in theproject directory > ProjectFilespath. Default path isC:\Users\<Username>\AppData\Local\Rockwell Automation\FactoryTalk Optix\Emulator\Projects\AlramSnF\ProjectFilesCopy Config File

- Provide the config file path as%PROJECTDIR%.ConfigFolderPath

- Follow the steps from the above section (Configuring FactoryTalk Optix to Connect to FactoryTalk DataMosaix SaaS – Continuation).
Provide Feedback