
Install FactoryTalk Optix - DataMosaix Connector
On the Extractor Info Detail page, once you select the source type as
FT Optix
in the Source Info field, a link to download the connector (Get FactoryTalk Optix DataMosaix
Connector) is displayed, which you can use to download the Optix-DataMosaix connector installer
file.Perform the following steps to install
FT Optix - DataMosaix
connector:- Download theOptix DataMosaix connector installerfile (FTDataMosaix_Optix_Connector.msi) from the Product Compatibility and Download Center (PCDC).
- Right-click on theFTDataMosaix_Optix_Connector.msifile and chooseRun as Administratorto begin the installation.TheSOFTWARE AND CLOUD SERVICES AGREEMENTdialog box is displayed.
- Read the license agreement and select theI accept the terms in the License Agreementcheckbox and then clickInstall.Installer Setup
 By default, the installation takes place in the following location:C:\Program Files\Rockwell Automation\FTDataMosaix_Optix_Connector.
 - Once the installation is complete, the ‘Completed the FTOptix_DataMosaix_Connector Setup Wizard’ screen is displayed. ClickFinishto close the installation window.After the installation is completed successfully, a shortcut to the ‘FactoryTalk Optix - DataMosaix Connector Setup’ will be created on your machine.Connector Setup Shortcut
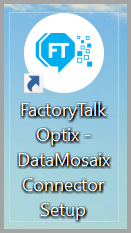
- Close theFactoryTalk Optix Studiobefore deploying the project for changes to take effect.
- Double-click on theFactoryTalk Optix - DataMosaix Connector Setupto open it.The 'FactoryTalk Optix - DataMosaix Connector Setup' window is displayed.FactoryTalk Optix - DataMosaix Connector Setup
 NOTE:If you receive a message about needing .NET to run the setup, download and install the latest version.
 - Specify the exact location of theFactoryTalk Optixproject by clickingBrowseand provide the project folder path.
- ClickDeploy Connector.Upon successful completion, a dialog box is displayed stating'Configuration Completed. Click on Browse Another if you want to configure the connector for another project'.
- (Optional) ClickBrowse Anotherto configure the connector for anotherFactoryTalk Optixproject.
NOTE:
Restart the
FactoryTalk Optix Studio
, if you are unable to see the FactoryTalk
DataMosaixStore.Provide Feedback