
Configure a Contactor or Starter
Follow these steps to configure a contactor or starter.
- In an existing controller project, make sure that the gateway is already added to the controllerEtherNet/IP™interface.
- Select the gateway, select New Module, then add the 100-E or 104-E device in the Select Module Type window that follows.Add a Starter
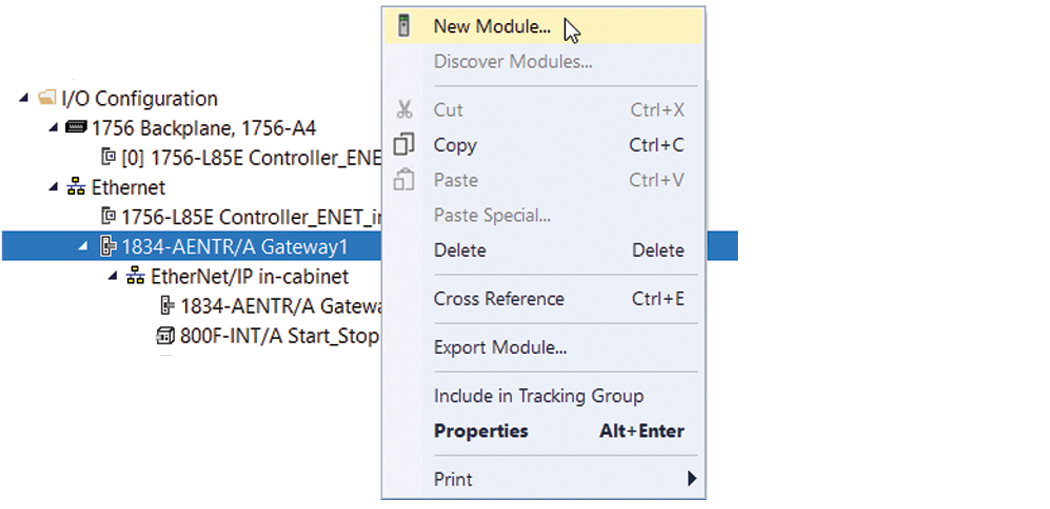 Example: Select a Starter Device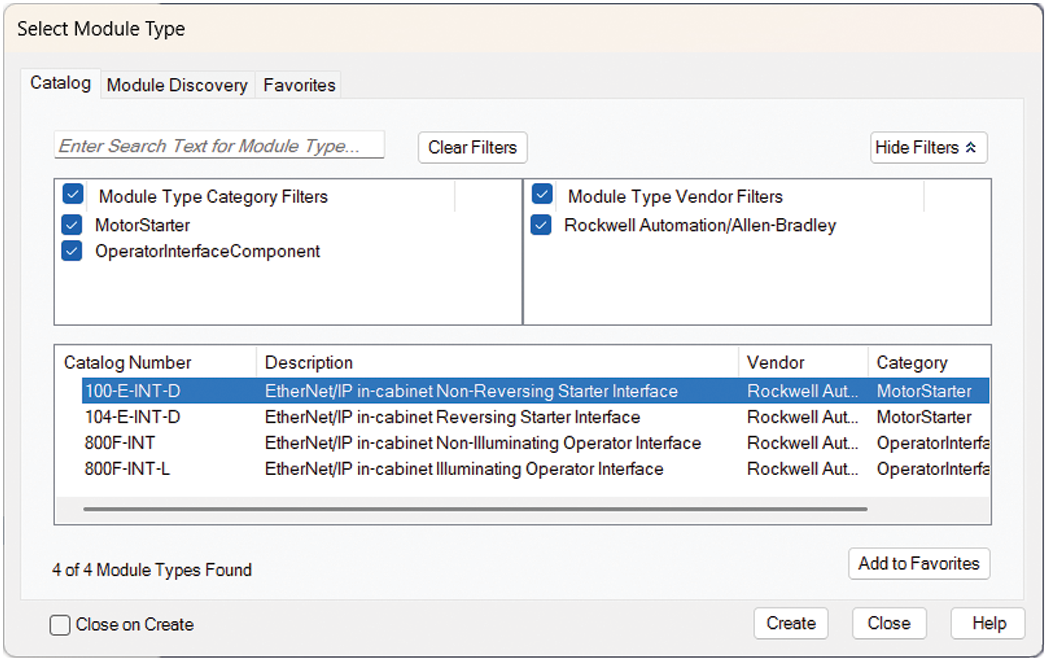
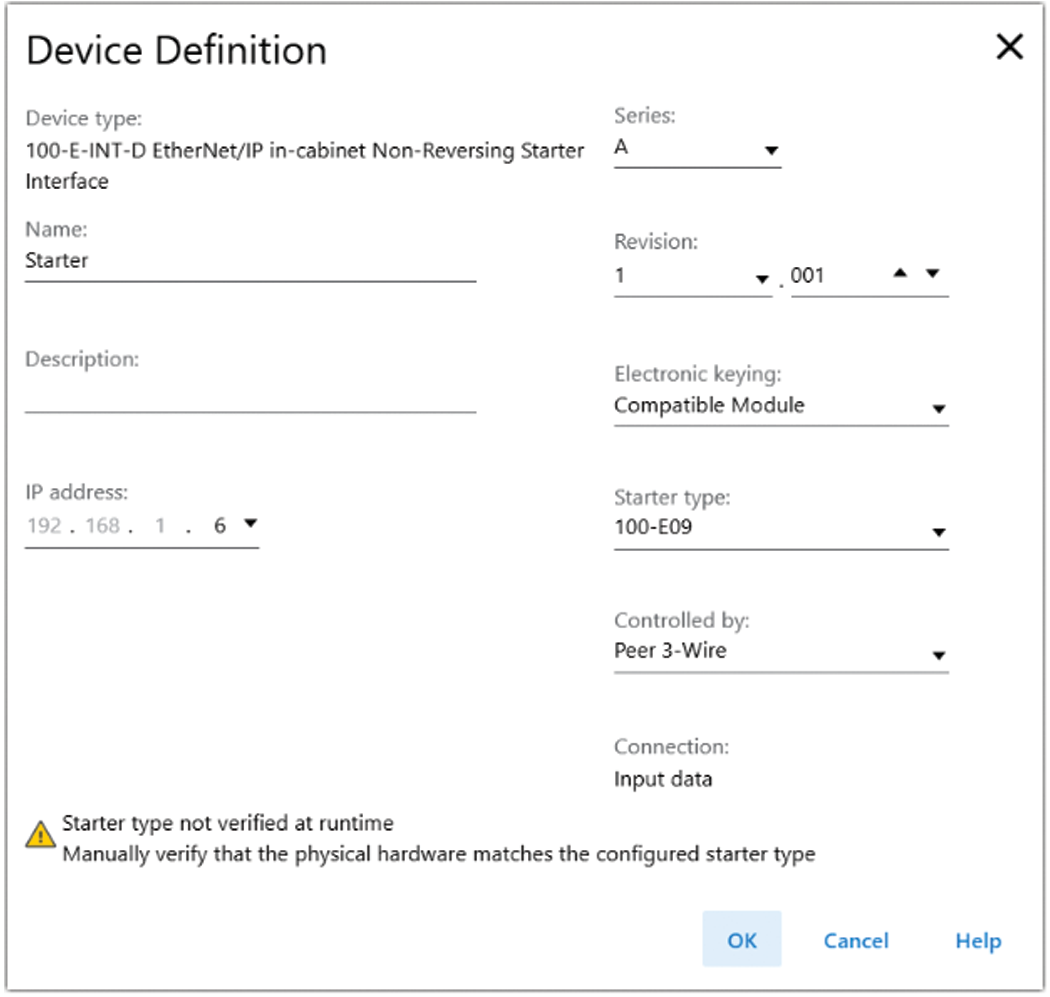
The New Module dialog contains Information views and Configuration views. The Overview view is where you enter the device definition parameters. For a new device, enter the Device Definition parameters.
Starter Device Definition
Field | Description |
|---|---|
Device type | Static field that displays the connected device type. |
Name | Enter a name for the device. |
Description | Enter a description for the device. |
IP address: | Select the final digits of the IP address for the device. The first 3 sets of the IP address are pre-defined. |
Starter type | Depending on the device, select the starter type. The starter type is not verified at run time. You must manually verify that the physical hardware matches the configured type. |
Controlled by | Select whether the device is controlled by:
Once you save the configuration for this device, you cannot change the controlled by selection. |
Connection | Displays the connection type for the device.
|
Provide Feedback