Verify Module Compatibility and Synchronization
To verify module compatibility and synchronization, follow these steps.
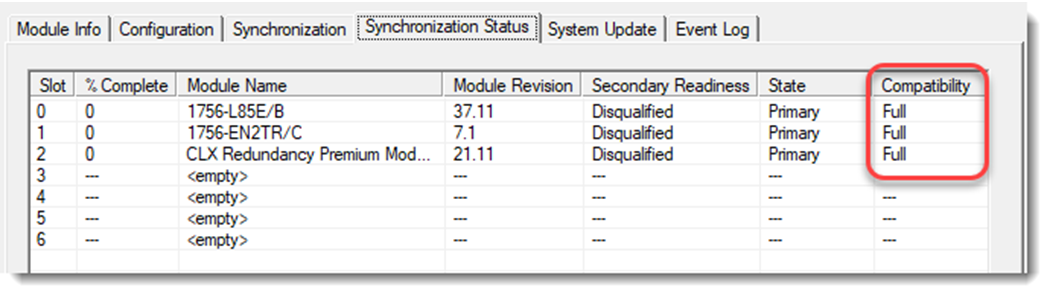
- On the Synchronization Status tab of the RMCT, verify that the modules are fully compatible.
- On the Synchronization tab, select Synchronize Secondary.

- Wait for the synchronization to complete.
- On the Synchronization tab, select Initiate a switchover.

- Disconnect the Ethernet cables from the communication module in the secondary chassis.
- Turn off power to the secondary chassis.
- Remove the communication module from the secondary chassis.
- Set the switches on the new series module to 888 and insert it in the secondary chassis.
- After the reset is complete, remove the module from the secondary chassis.
- Set the switches to the same settings as on the module that was removed.
- Reinsert the module into the secondary chassis, reattach the cable, and apply power to the secondary chassis.
- To support bridging across the backplane (or via the USB port), configure the Port Configuration of the secondary module to match the Port Configuration of the primary module.
- Update the firmware of the new series module.
- Repeat the steps 5…8 for all communication modules in secondary chassis.
- On the Configuration tab of the RMCT, set Auto-synchronization to Always.

- Select Apply, Yes, and OK.
- Verify that the secondary chassis has qualified.
Provide Feedback